This page is a collection of blog posts that were created during the 2016 drydocking of Pampanito. The posts have only had minimal editing and are meant to show the evolution 2016 drydocking, not to replace a formal report. The dates below the posting and photos are when posted and are usually the same or next day after they were taken.
Index: Blog Entries:
Enclosed are a set of photos showing how an engine sea chest gets blanked.
- First the sea chests are cleaned, prepped for coating, coated, and the screens re-installed for preservation.
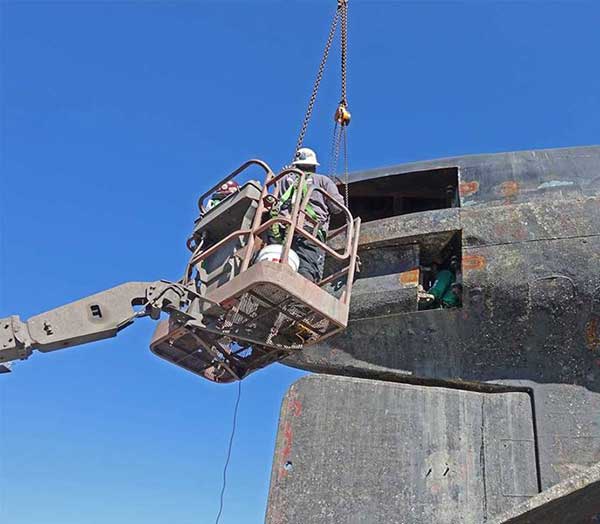
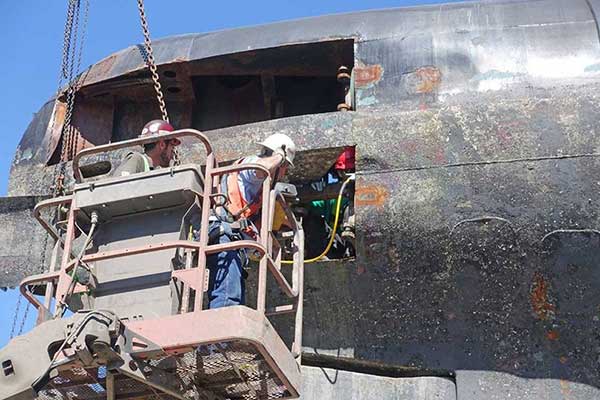
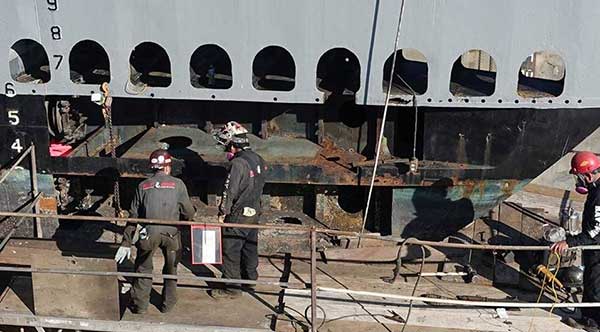
Yesterday the shipyard crew removed the six torpedo shutter doors forward. The first one was slow, but then the other 5 went fairly smoothly.
Today they struggled most of the day to remove two of the doors aft and will need to work on the other two on Monday. The last time the shutter doors were removed was 1987. Our shipyard project manager thinks we should be doing this in every dry-docking to get good quality of work, both steel repair and coatings in the free flood spaces that are the hardest to preserve. Of course it will be easier if we do this every 7 years because fewer parts will be frozen, and we will have the memory of how to do it.
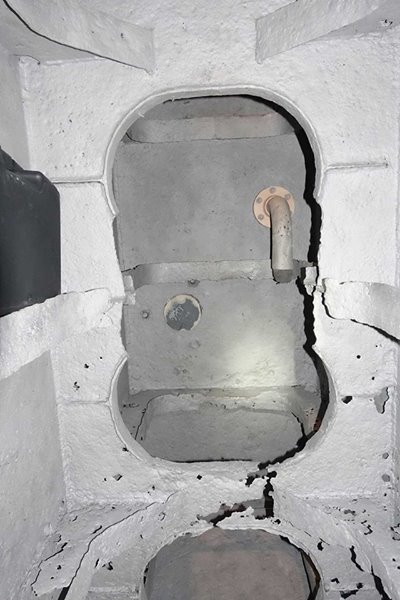
We have used the #2 sanitary tank (CHT) for the galley grey water and the head black water (sewage). Sewage is really corrosive so sanitary tanks always need special care. We knew from past drydockings that the internal framing was almost all wasted away, lacy or cut away. We knew the tank was pitted, but not how deeply. We wanted to install a smaller sub-tank lined with rubber in the sanitary tank to minimize the damage to the steel of the tank, and the recurring cost of prepping and painting the tank during drydocking. At some point it would be good to restore some of the framing. However, we did not have the money so we are blasting and coating the tank even though we know that long term it would be cheaper and better at preserving historic fabric to create the sub tank.
The tank is smaller than it looks in the photos, it is hard to enter the 12"x16" oval hatch, it is hard to move through the lightening holes, it is hard to turn around. The lacy metal is full of sharp edges. It is hot in the tank. It is a confined space. So now I want you to consider that Luis Menjiuar from the Bay Ship & Yacht spent three days sand blasting the tank. This is honest hard work. Below are photos taken after cleaning and blasting to bare metal the tank. I used our newly donated ultrasonic tester to sample the thickness of the steel. I did not get good repeatability even with a freshly blasted tank and a lot of gel. There just weren't good smooth places to measure. The samples are pairs where I found a high spot and then a pit nearby. The pits were particularly hard to measure. The tank is widely pitted both on the outer hull and the two bulkheads. There was no reason to measure the lacy framing.
If you a real ship nerd and want to understand this tank, see:
Over time we have learned how non-historic changes have nearly always led to lower safety and greater cost later. It is remarkable how few non-historic changes have been necessary: visitor access safety gear, visitor proofing for safety and security, shore utility connections and power systems, sealed flood ports and sea chests, etc. It is equally remarkable how many regrettable changes have been made and how much it has cost us to restore previous changes that were well meaning, but turned out to mistakes. For example, during this dry-docking we are blanking sea chests that never should have been opened.
We are *considering* three changes to make it easier to remove and replace the 8 torpedo shutter doors below the waterline when in dry dock. 1- We *might* leave the side cut outs made to allow the roller bearings on the shutter doors to be removed from the bottom 8 tubes. We would restore these on #1 and #2 because the upper cut out is so large that it might effect strength, and it is quite visible. Note that the shutter door needs to be disconnected to get to the end of the track, and we have a safety tab on the outer door in any case. 2- We *might* leave the lifting eyes that were welded on to the shutter doors for removal on all but the #1 tube. The riggers did not want to use the two holes in the shutter door that were provided so they welded these on the doors. If we leave them on we will not have to grind them off, and not have to create more heat effected zones in the steel during future dry-docks. The ships manager would like them aft to make it easier for the crew to maneuver the small work skiff they use for painting. On the other hand, the ones above the water line aft will be confusing to anyone trying to figure out how the tubes work and they are ugly. 3- When donated by the Navy there were U-channel strong backs over the torpedo tube outer doors. During past drydockings these were exchanged for tabs welded between the hull and the outer door. This works, but it requires grinding them off, and re-welding each dry-docking. This is not only expensive, but also has the heat effected zone steel problem from repeated welding. We are *considering* welding L-brackets with a hole for a bolt on the hull, and the torpedo shutter door in the same place that we have been welding the tabs. These would be only on all but #1 and #2 tubes which are well above the waterline. After entering dry dock the bolt could be removed, and if needed cut without heating any of the historic fabric of the boat. Again a bit bizarre looking on the aft tubes were they will be visible. These are some of the ideas that the ship's manager is considering to reduce cost, and reduce damage to historic fabric. He has some time before reinstallation to consider the trade-offs, consider alternatives, seek input, and then decide.
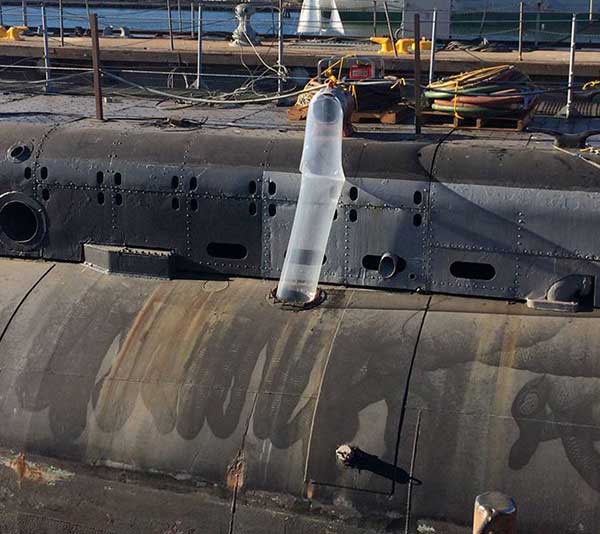
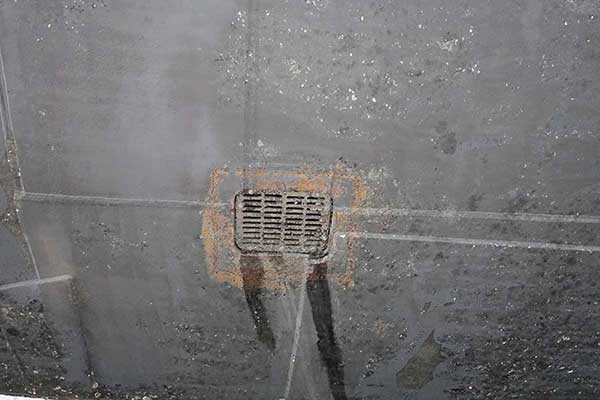
Here is one of the through hull openings for water discharge that has been blanked for safety.
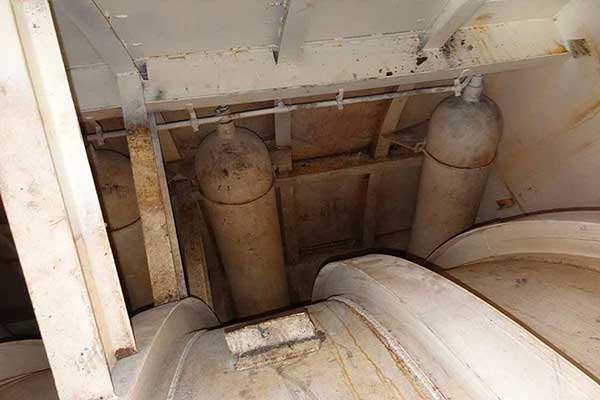
We had to open and gas free (check for potentially explosive vapors) the tanks where welding is occurring on the outside. This provided an opportunity to stick my hand in with a camera to see the condition of 6 of the tanks.
It was a pleasant surprise to see they are mostly in good condition. Better than the fuel ballast tanks we inspected 10 years ago. This is important because probably more ships have sunk from corrosion that occurred from the inside out than from the outside in.
When we had a 7 year interval on dry-docking there was some rusting at the wind and water, but not the serious damage we are seeing at 10 years. The amount of steel, blasting, and coating needed made it necessary to remove the torpedo shutter doors for the first time since 1987.
Not cheap, but necessary. FYI, the guy in the white hat is Master Chief (Ret) Charlie Butcher, he and his company Manson Construction have donated time, services, etc. with a quiet, and really admirable generosity.
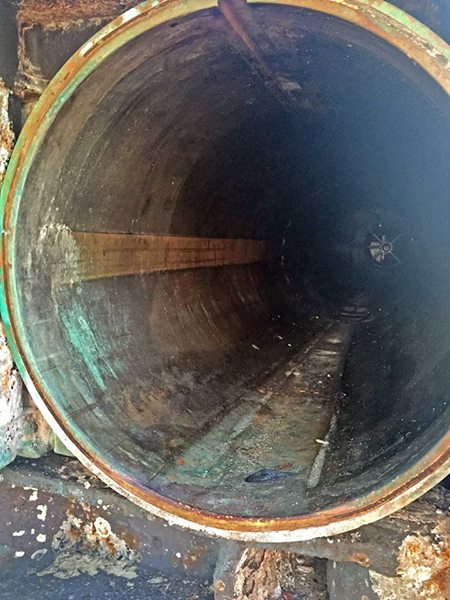
This shows #9 torpedo tube. There was about 3" of water caused by a leaking gasket. Note that we do not open the inner doors of the tubes below the waterline at the pier. We will be installing newly designed and custom molded gaskets later in the dry-docking.
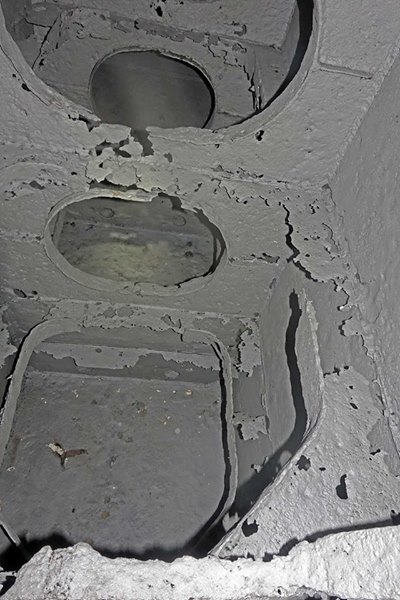
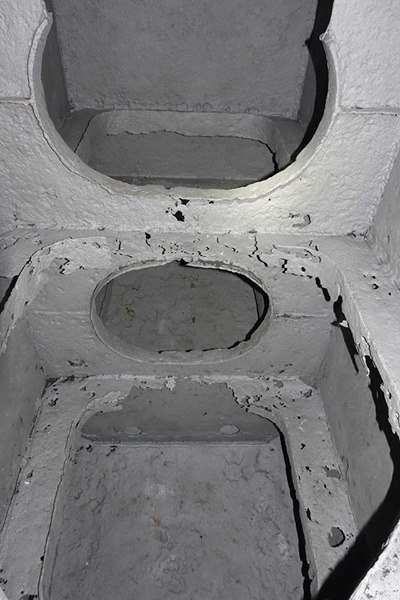
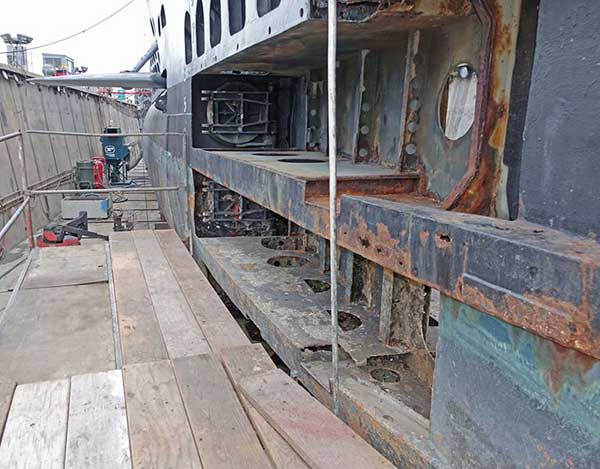
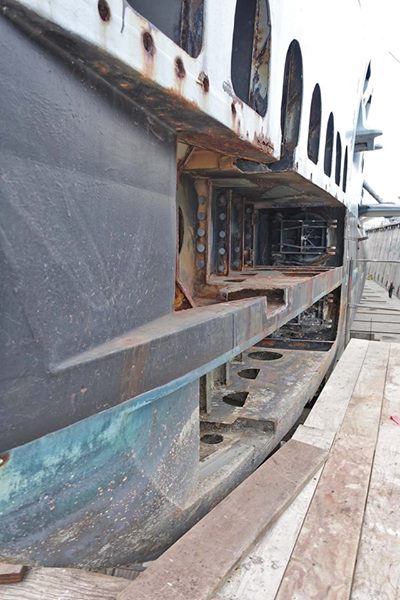
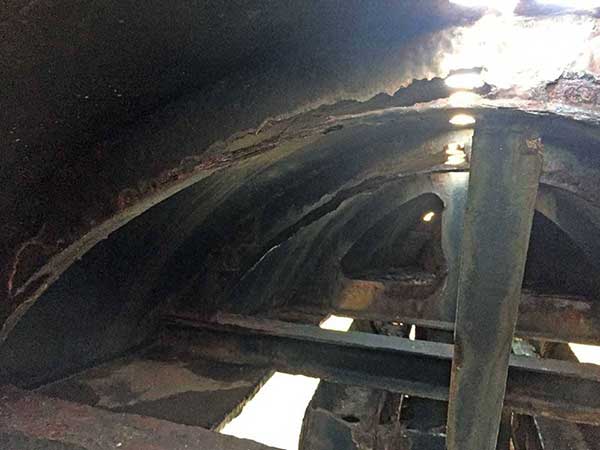
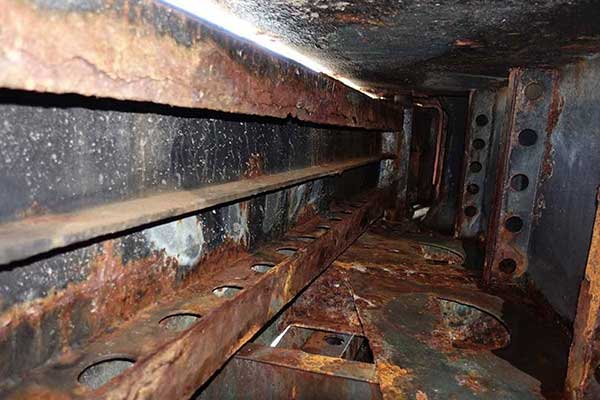
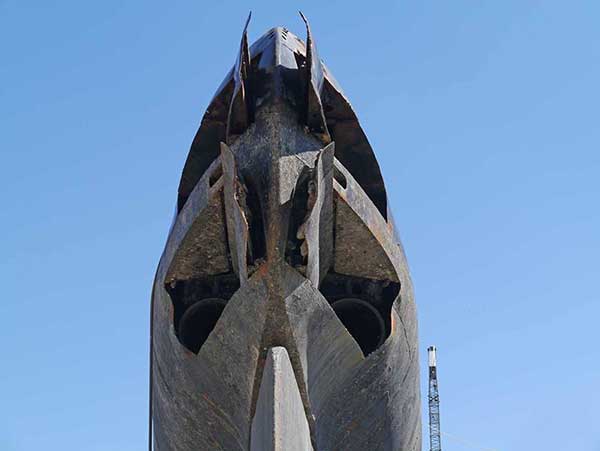
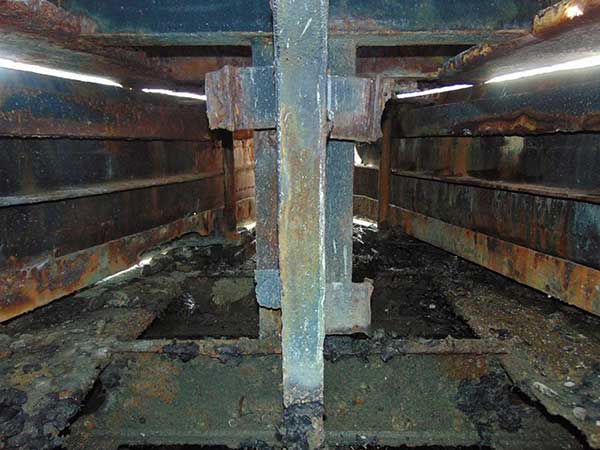
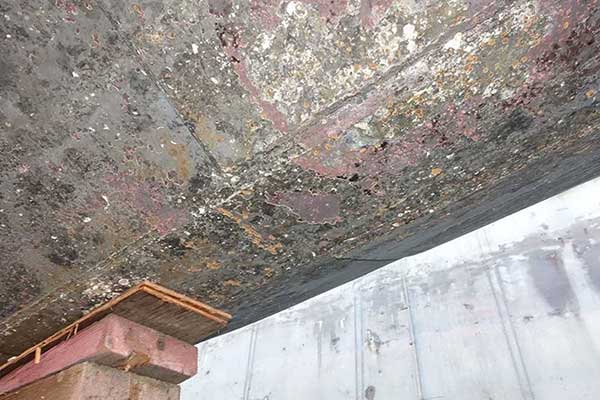
The photo is a little tough to read, but this is above the torpedo tubes aft. We can see entire frames that have lost all integrity and will need repair this cycle.
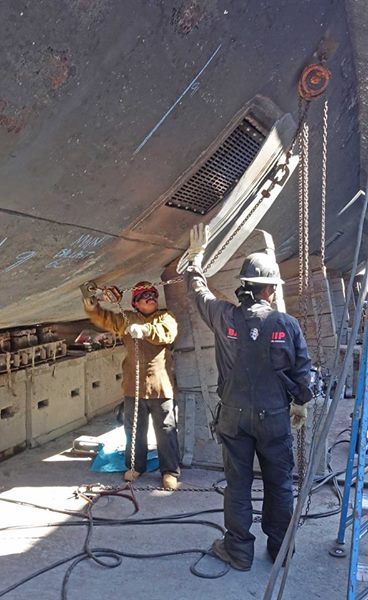
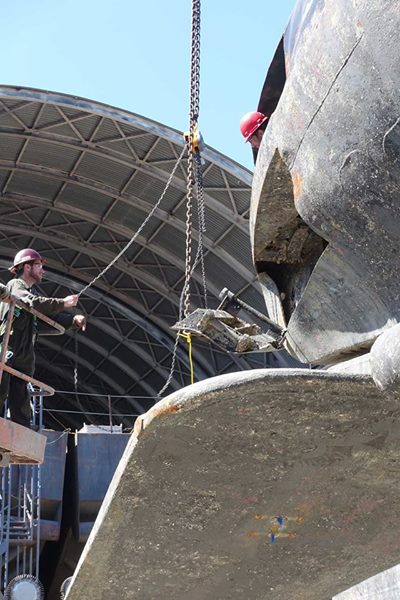
We have also decided to remove the torpedo shutter doors because they are so badly rusted. We wanted to do this last time get better access for all the painting, but did not have the funds. Doing the steel repair with them out of the way will be easier.
Video of Pampanito rigging bow planes under hydraulic power:
OK, we know these are unedited hand held video so you do not have to remind us. On the other hand, I am not sure any of the other museum boats can still do this under hydraulic power.
These photos shows some of the damage to the torpedo shutter doors and superstructure. 10 years is just way too long between drydockings.
The bow planes need to be rigged out to get full paint coverage. We did not tilt them this morning, but have done this during past drydockings.
We operated the torpedo tubes, and the bow planes in "emergency" mode from the main hydraulic plant instead of the tilting motors in the torpedo rooms. It was simpler. Before the end of the dry dock we will also need to move the rudder and tilt the stern planes. The crew ran out of time today because of the forward torpedo tube problems.
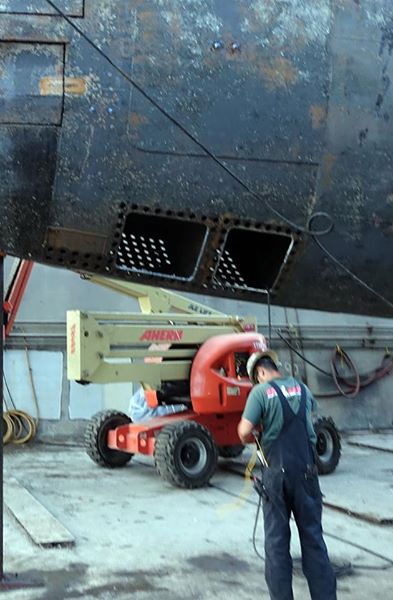
The area around the torpedo shutter doors is a problem because it is mostly thin metal and near the bronze torpedo tubes. It is especially difficult at the wind and water line. To be able to paint all the surfaces, both inside and out Charlie Butcher led the work to open most of the torpedo tubes this morning. Everything worked fine aft, forward three tubes of the six tubes did not open or only partially opened. The crew spent much of the afternoon cleaning and lubricating near the tube outer doors, and tomorrow they will check the rams in the free flood spaces before trying again. If we had more money we would remove the shutter doors as they did during Pampanito's first museum dry-docking. It would allow better access for steel repair, paint, etc through out the flooding spaces forward.
Note that hydraulic infrastructure was modified a couple of years ago primarily to make it easier to operate in dry dock (no high pressure air needed.) The system worked flawlessly and really was safer and easier. Note how aft the doors open out of the hull, but forward they move inboard. We noted some water had leaked into some of the tubes. One of the important projects this dry-docking is to install newly cast rubber gaskets for all 10 tubes both inside and out. Paul Flowers, a Lockheed engineer drew up the design and Eutsler Technical Products cast and heat treated new gaskets for both the outer and inner doors. Other museum boats have had leaks into the tubes, but we are the first to replace the 70 year old rubber. Note that the area around the man hole for access aft is lacy. This will need repair.
Here is a 2007 presentation that shows how Fleet submarine hulls fail:
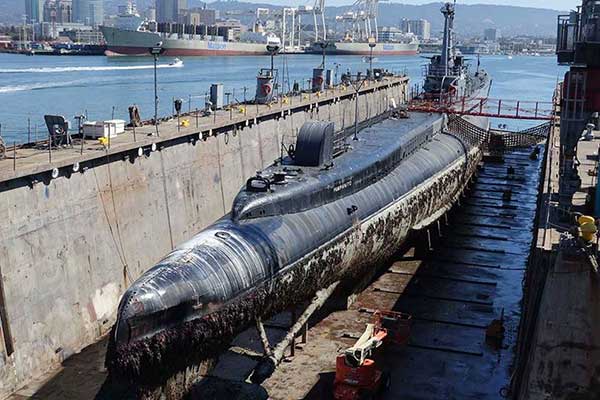
Another view of status after one week in dry dock.
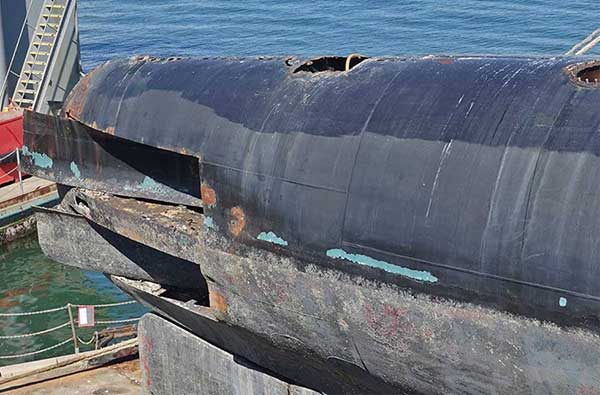
A photo from this morning shows the externally visible damage to the superstructure. Note the ragged edge of the vertical metal. Not visible in this photo is also extensive damage to the frames that support the superstructure and deck where they connect to the submarine's hull, and the deck itself. This is port, the side of the boat that is normally opposite the pier. It is also largely rusting from the inside out. This side gets more wind and wave activity, and is less visible to the maintenance crew. All the museum submarines have had problems here because preventing it requires disciplined, consistent maintenance of the coatings. Unfortunately, we do not have the funds in the $600K budget to do any repair. Once the metal becomes lacy like this the paint does not hold as well and we can expect more rapid failure. Because this is above the waterline, repairs can be done at the pier. However, this will require a skilled welder and assistant and will be slower and more difficult to do than in dry dock (but less expensive in the end).
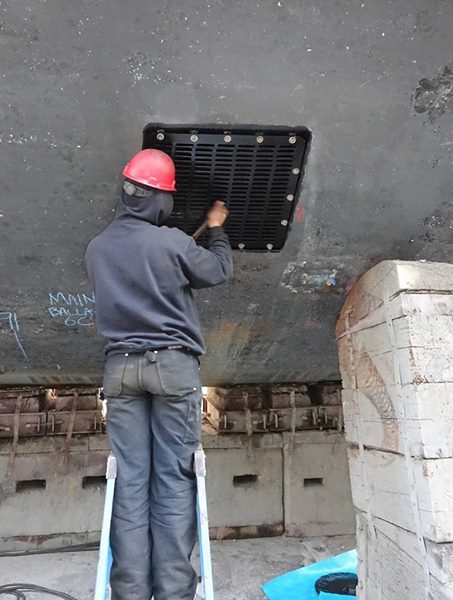
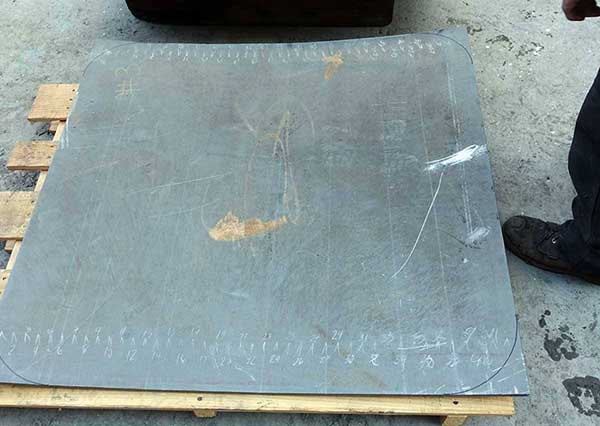
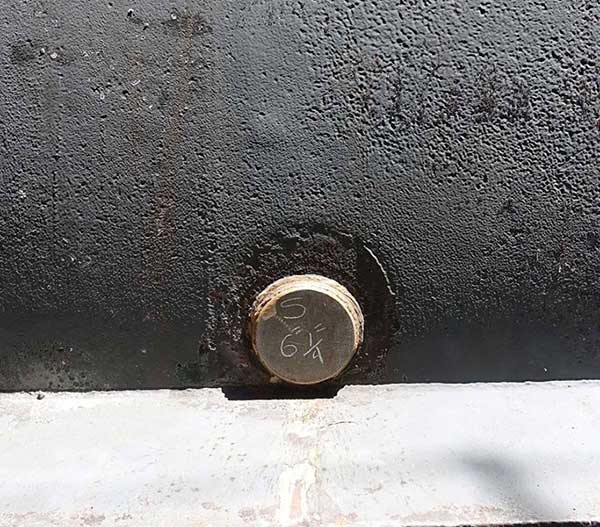
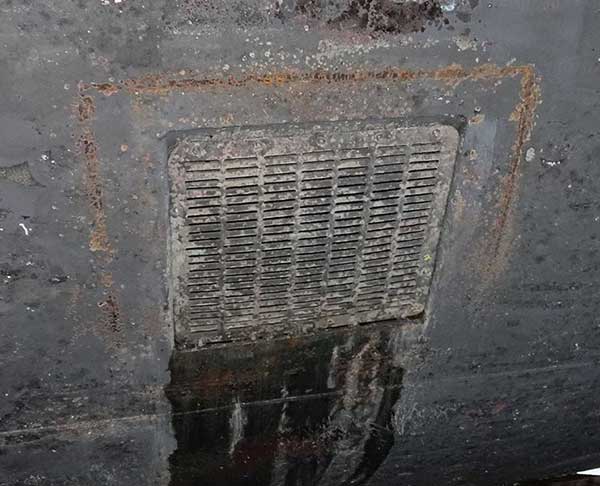
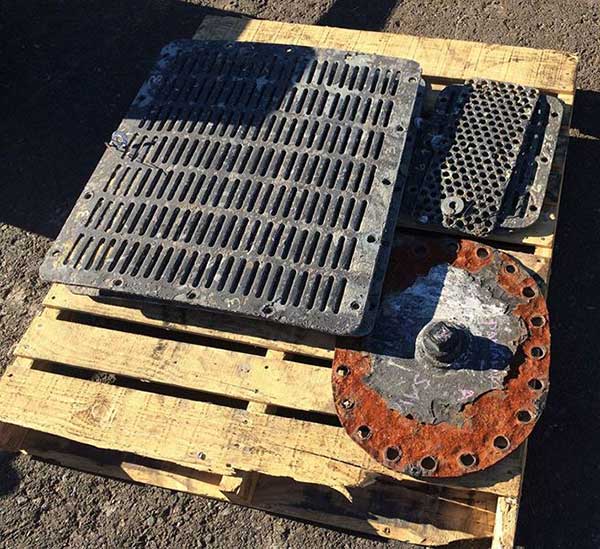
A Sea Chest is a box like hole in the hull that has a through hole for water intake. We are going to blank (weld a watertight cover of steel) over all the sea chests and through hull fittings. This will mean fewer places with bronze next to steel underwater, and generally make the boat safer in the museum. In the first photo below you can see the side of Pampanito's hull with the sea chest covered by a screen. In the second the screen after removal. The third shows the sea chest with the screen removed. The shipyard will clean and paint inside the sea chest, re-install the screen so it does not get lost, then weld the blank over the top.
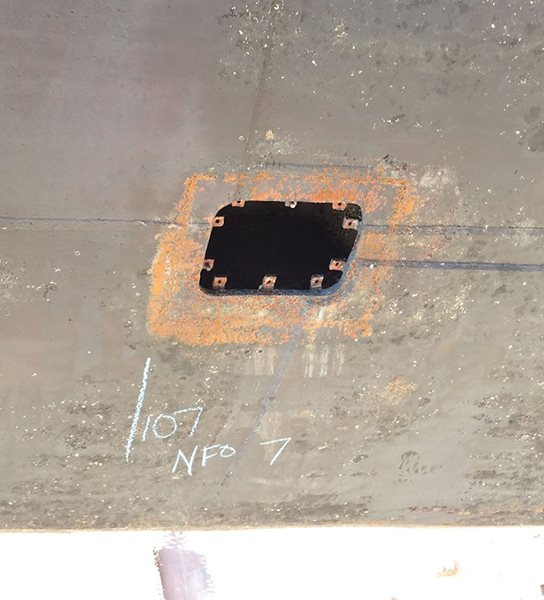
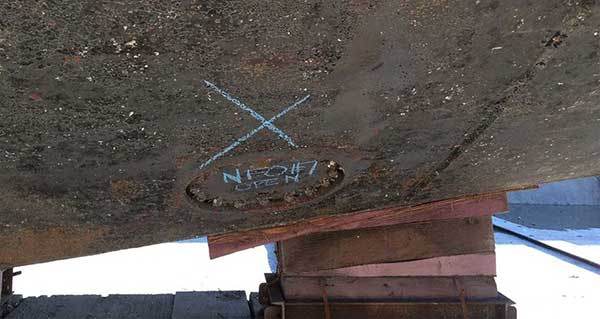
Welding the side of the hull or a tank is interesting because the heat of welding will go through the steel. The welder has to think of what is happening both on the inside and outside. The sea chest are installed in tanks. Tanks have some combination of water, fuel and air. So before welding on any tank it has to be opened and the air or liquid checked to make sure it does not have fuel that could cause a fire or explosion. So the fourth photo shows an open tank top with a blower pushing fresh air into the tank (and any bad gas mixture out.) This is typical of most tanks on normal ships. In the museum, tanks are normally full of fresh water, or of air. No fuel oil, and no partly filled tanks. Fleet submarines are unusual in that 6 normal fuel oil tanks only have man holes for access at the bottom. For example NFO 7 in the photo below. This tank is full of fresh water. So they will take a sample and verify that it is just water before welding the tank below that water line.
A view of the torpedo shutter doors from inside the free flood space. It is very rough, we will have work here.
A correction to my earlier post. Ships manager decided not fleet the boat, i.e. changing the blocks. We do not have the $11K. I disagree with this, but it is his decision. The really experienced ship repair guys point out that most serious corrosion problems (deep pitting, wastage) are at the wind and water line, and from the inside out. The wide expanses of outer hull do not normally have problems, esp. with a catholic system and good grounding/electrolysis management. This agrees with my narrower experience. The 40 year experienced equipment manager that advises us does not fleet their barges, they just change blocking each cycle. He also notes that when fleeting you are putting the weight of the ship on fresh paint. My counter argument is that the museum is not as good at catholic protection/electrolysis management, the sub has much more bronze underwater, other ships do not have big free flood spaces of sheet metal around bronze, and our dry-docking schedule is unpredictable.
Same in the aft trim tank, its coatings are in better condition, the rods and seals about the same. There is rust and discoloration on the bulkheads. This will need to be addressed in future drydock.
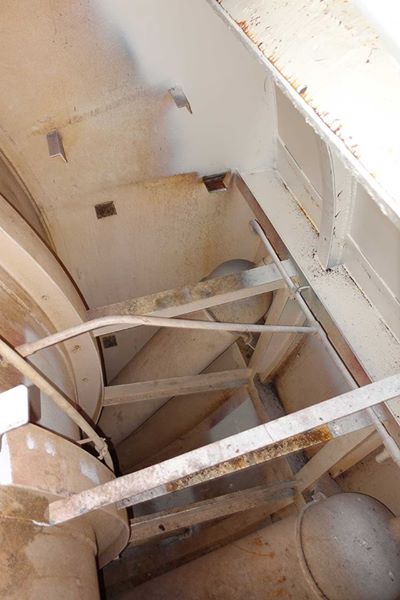
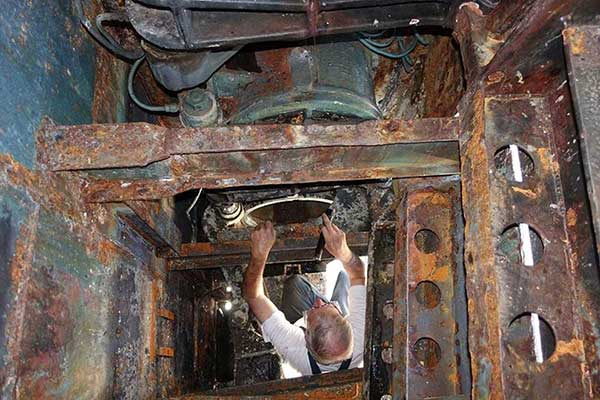
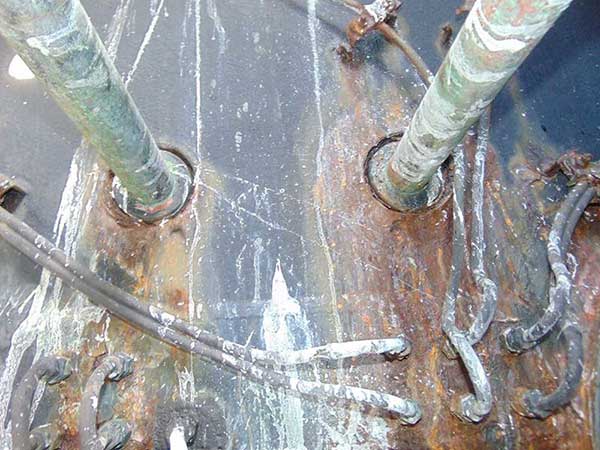
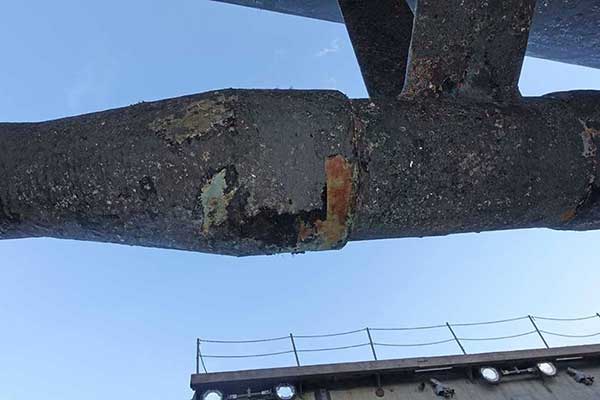
The torpedo tube outer doors are operated by hydraulic rams that pass through the pressure hull, into a trim tank, and they out of the trim tank into the free flood superstructure. We have always been really careful on the checks of the propellor shafts, but for some reason have never entered the trim tanks that are also an interface to the sea. The good news is that the tank had only an inconsequential amount of water. The rams will be lightly cleaned and greased, their seals greased from the fittings in the torpedo room and we are planning to open the tubes on Monday to allow better access for prep and paint.
A note on entering tanks. It is a big deal. The tank needs to be empty, then it is ventilated, then checked to make sure the air is safe to breath (marine chemist), there has to be a specially trained confined space entry manager ("shipyard competent") and only then can it be entered. Enclosed are photos from forward trim tank.
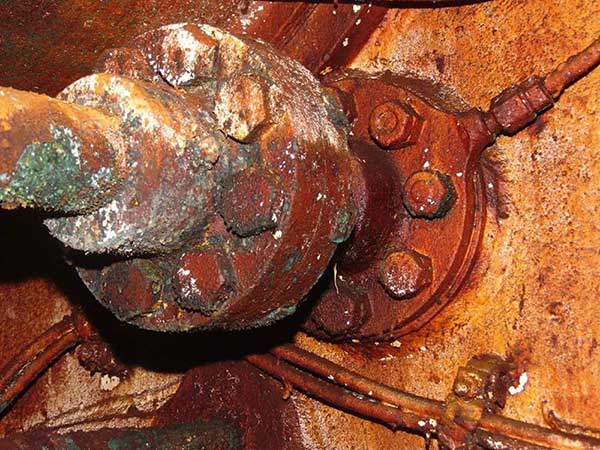
One of the threaded studs that holds the zinc sacrificial anodes to the boat broke and will be replaced. The photo is another view of the typical condition of the hull.
Different metals connected by a conductive liquid (salt water is a pretty good electrolyte) form a battery which removes material from one metal (electron) and adds to the other. Electrical ground faults inside the boat can also cause stray currents. Inexpensive zinc bars are electrically bonded to the hull because they are more electrically active and therefore degrade before the steel (electrolysis). They are sacrificed to save the steel. This also slows the growth of pinpoint holes in the paint. Last dry-docking at about 7 years we still had a small amount of protection, this time at 9.5 years there was nothing. At the pier we can use an electrode on a wire dipped in the bay to test the cathotic protection so this was not a surprise. We also have these in the free flood spaces forward and aft. These are the most vulnerable to corrosion because there are big bronze torpedo tubes, hydraulic rams and other dissimilar metals are close to the thin sheet metal that forms the structure of the boat forward and aft of the pressure hull. In theory the zincs can be replaced in the water (bolted on), in practice this is difficult. We could also add electrodes hanging on wires over the side that do not degrade and are powered from an active controller. This would work for outside the pressure hull, but the experts we have consulted so far have not been ready to design something for our most vulnerable spaces around the torpedo tubes. None of the other fleet type submarines have solved this problem and so they rely on zincs as well. This dry dock is inspiring us to re-open the research into an active system, invite the corrosion engineers again and see what they recommend. In any case, the catholic protection system (zincs and/or active) does not replace the paint. They complement each other to preserve the hull.
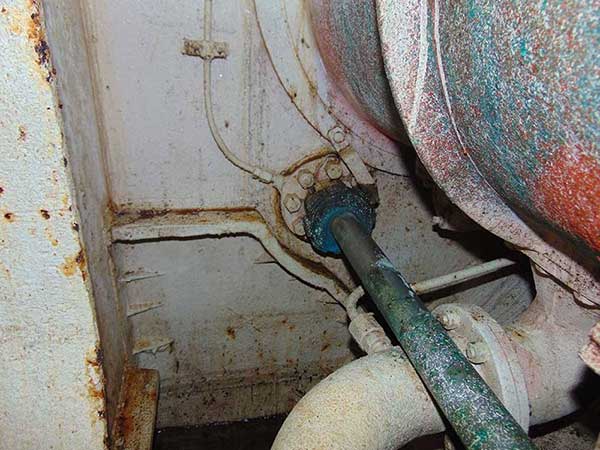
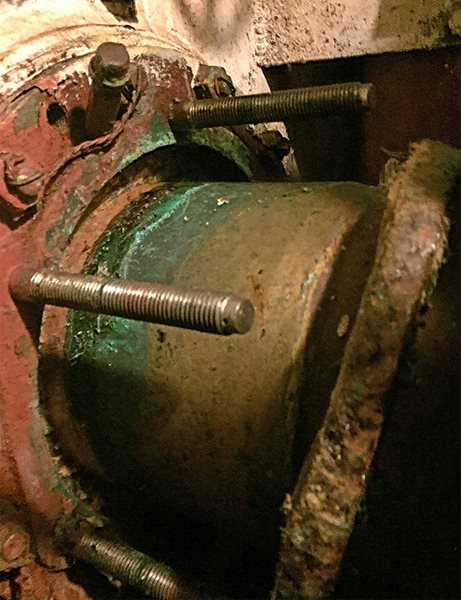
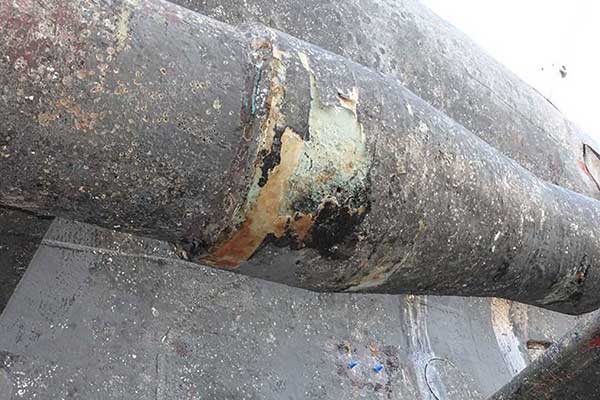
Here are photos inside and outside of the propellor shafts. Inside, this photo shows the packing nut slid forward out of the way and one ring of packing removed. The packing showed no sign of water incursion on either shaft so we will simply put a single fresh ring of packing and re-install (good news.) On the outside there is a photo showing the damage to the fiberglass boots that isolate the bronze tailshafts from the steel hull, and provide another water tight seal. These will need some repair.
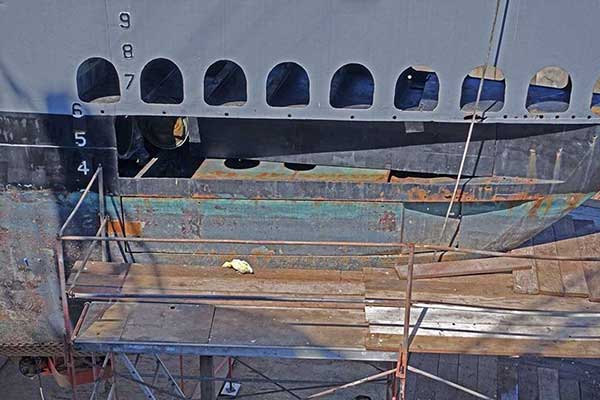
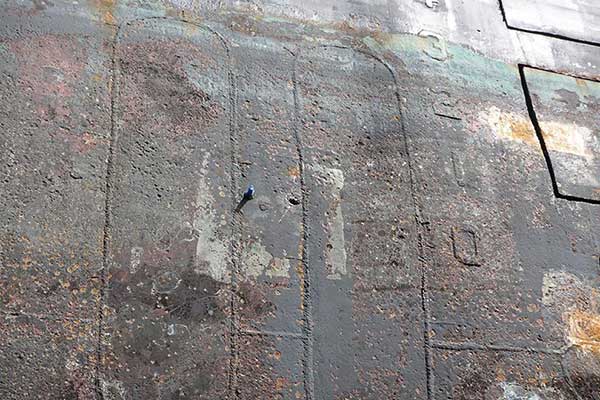
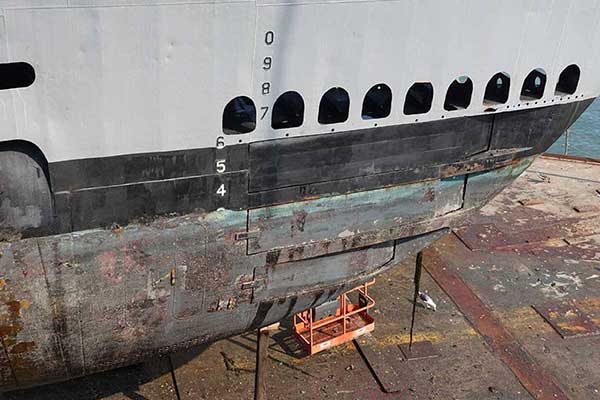
A view along the keel forward. The pink is primer paint, brown rust. This is why we try to have full coverage of the bottom of the hull by "fleeting", that is shifting the blocks during the dry dock so the area that supports the boat now can be painted.
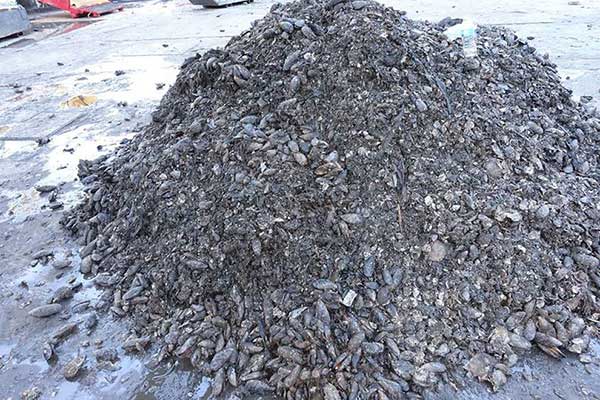
Last time (2007) we had to blast to bare metal about 12-15 percent of the hull. This time it looks like we are going to have to blast quite a bit more. 9-1/2 years is way too long for coating that typically last 5-7 years even with catholic protection outside and good electrolytic housekeeping inside the hull.
The chain locker and a void are really hard to access and clean from above. We have opened these up during each dry-docking to effectively clean and coat the spaces.
Dinner
We have fiberglass boots (covers) over the bronze propellor shafts to reduce corrosion. They also cover the seal into the hull. There is damage to both so we will have to remove all the loose stuff and re-cover with new material.
This shows were the stern anchor chain rubs on the hull. We would really rather have offshore piles and mooring lines to avoid this chaffing.
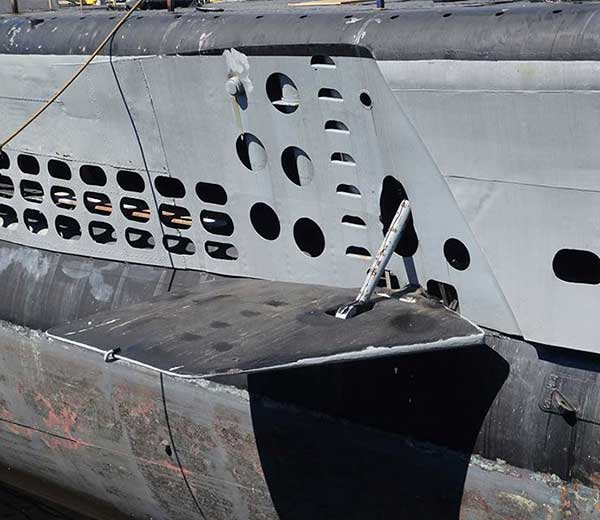
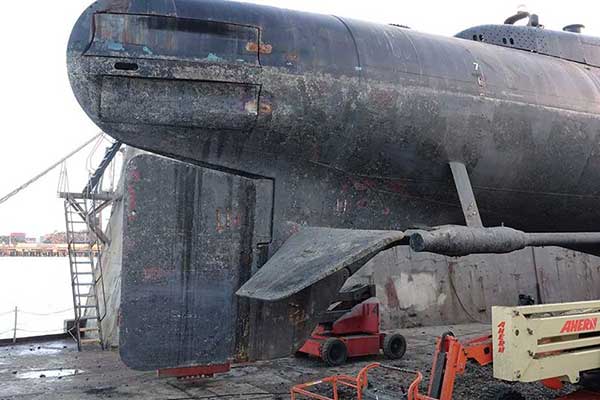
Stern after cleaning. The safety tabs on the shutter doors have be ground off as the first step in preparing to open the 21" torpedo shutter doors. We only do this in drydock for safety reasons. We need to get them open to replace the 70 year old rubber gaskets that have leaked on other boats, and to access all the free flooding spaces around the shutter doors and torpedo tubes.
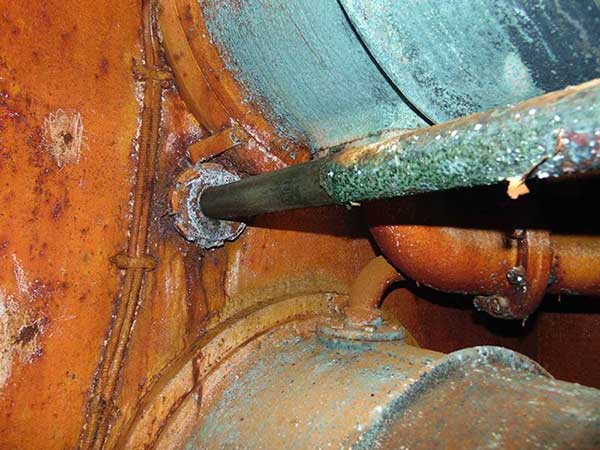
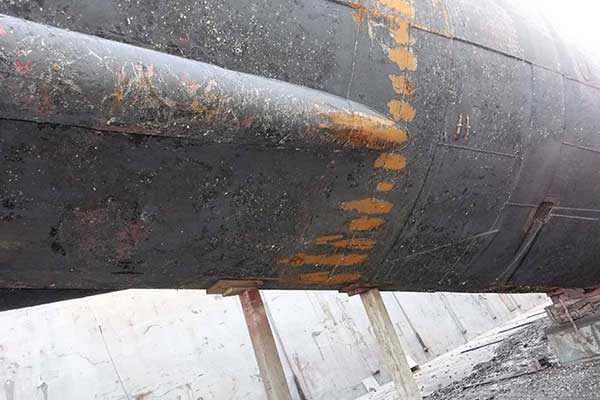
This is one of the two engine room sea chests (water inlets). These, along with openings in the maneuvering room and pump room will be cleaned, painted, then covered with a welded steel blank. This will make the boat safer, and will reduce future maintenance. With them open, the sea valve inside the boat needed to be serviced during each dry-docking. It also meant that the bronze piping and valve was connected by sea water to the hull. This explains the failed coatings you see around the sea chest and probably inside the screen. Also note the shape of the rust. It follows the welding pattern of blank that was welded on previously. Steel that has been welded is more likely to rust.
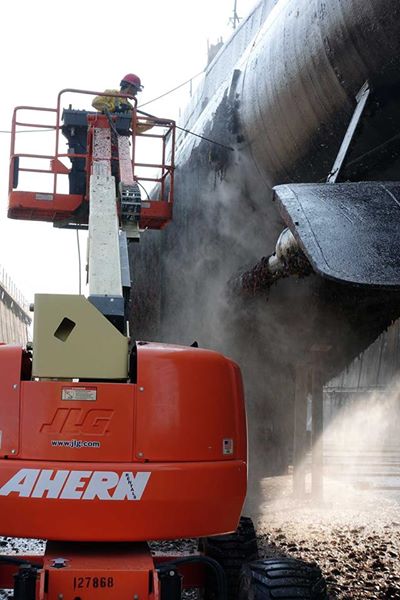
The yard will finish water blasting the exterior hull today. Then they will work on the free flood spaces. Yesterday they unbolted and slid the tailshaft packing nuts back and inspected the first ring of packing. As expected it was good and showed no signs of water intrusion. We always check this even though there we do not turn the shaft and have an external fiberglass cover on the shafts. They replaced the one ring of packing and reinstalled. The sanitary tank (sewage tank we use for overnight eduction program toilets) was emptied as well. We are going to fix its coatings (paint). We wanted to put a smaller tank in the tank, but did not find a donor for the tank.
Work started at 5:30 AM finishing the safety preparations. The regular shipyard crew starts at 6:30 AM.
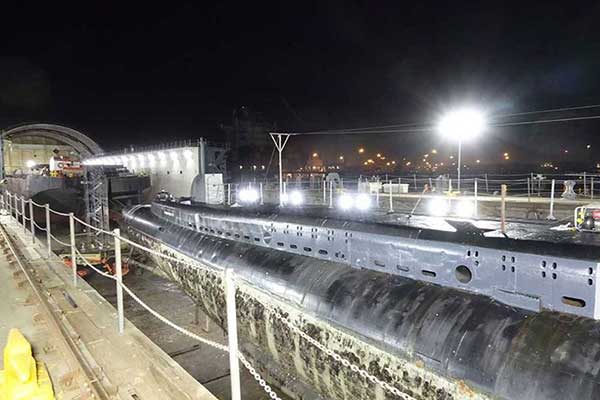
Power blasting away the marine growth. Once clean you can see where the paint has failed completely at the wind and water line, pink areas are the primer from last dry-docking, true black is topcoat paint. Grey is where paint has failed to the steel. We will not really know how it bad it is until all the exterior, and especially the free flood spaces have been cleaned. A couple of days more. Note that the zincs are completely gone. You can also see the welded safeties on the torpedo shutter doors below the water line, these will be removed so we can open the tubes.
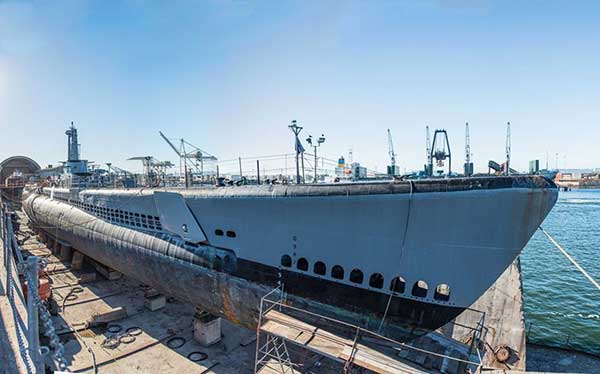
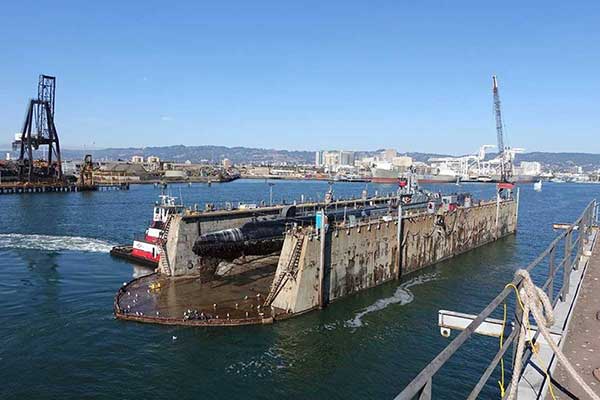
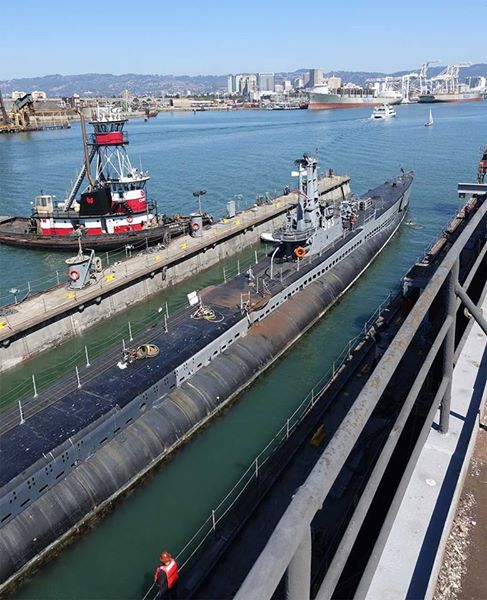
Pampanito on the blocks. The tugs moving DD-1 with Pampanito about 400 feet from aside HMB-1 to the pier. Note that DD-1 is made of concrete and was built during WW II. Here she is lifting about 1,500 tons of submarine.
Here are some photos with DD-1 outboard of HMB-1. The photo from above Pampanito was taken from the wing wall of HMD-1. For info about HMB-1 see the Sea Shadow tour.
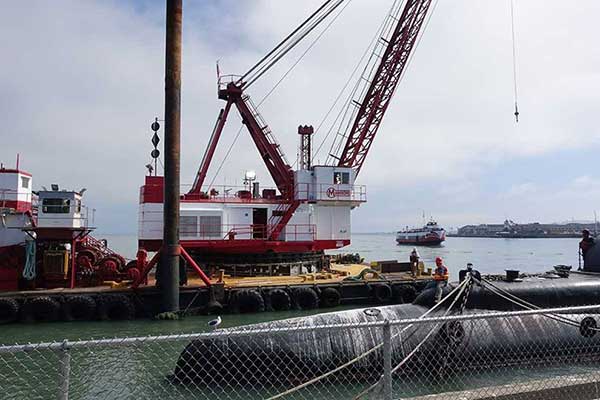
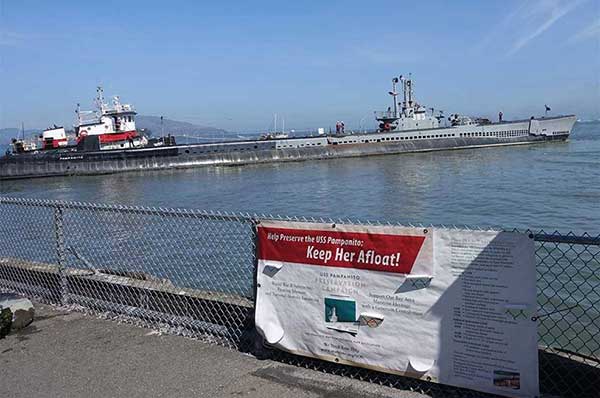
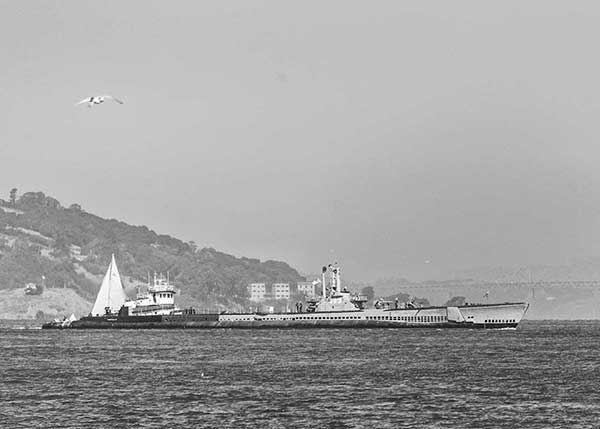
Some photos of the crew from Manson Construction that removed the complex mooring system Pampanito uses at pier 45. With some photos of the tow.
Index:
|


