This page is a collection of blog posts that were created during the 2016 drydocking of Pampanito. The posts have only had minimal editing and are meant to show the evolution 2016 drydocking, not to replace a formal report. The dates below the posting and photos are when posted and are usually the same or next day after they were taken.
Index: Blog Entries:
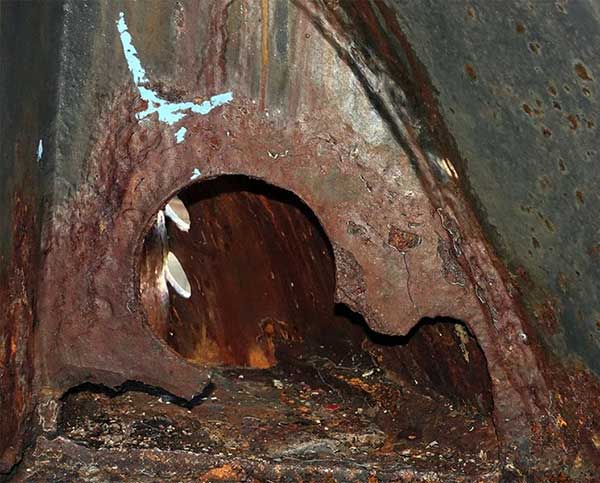
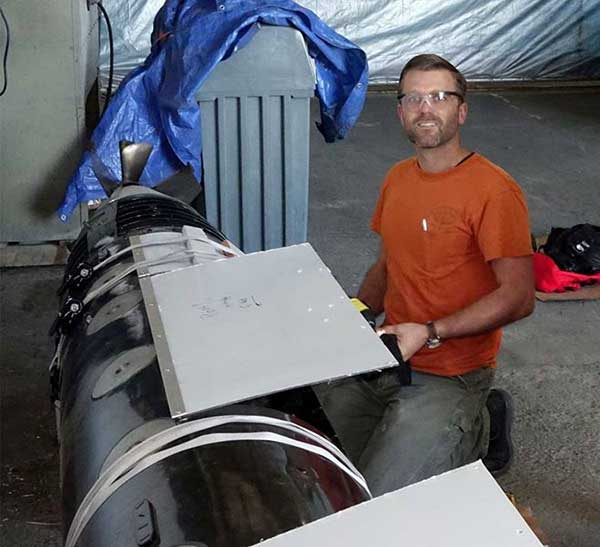
A few posts ago I described the difficulties of blanking the motor room sea chests that are in normal fuel oil tank #7 (NFO 7). The marine chemist became concerned that the welds would be too near the boundary between NFO 7 and a lube oil tank next to it. NFO 7 has treated fresh water in it more than three feet above the welds. So for this tank they needed only to vent the tank with air and monitor the gas vapor. The lube oil tank needed inert gas (CO2 in this case) used to replace the air at the top of the tank. We thought this was all that was needed until the steel doubler at the bottom right of the blank was found to have grease between the hull and the doubler. For this holes were drilled and inert gas added. The root pass (first layer of weld) was done with gas flowing into the holes, one of the hole filling and the other venting, and finally the holes plug welded. We will have to keep a eye on the plug welds during future drydockings.
All in all, this landed up being one of the more complicated blanks the shipyard crew could remember. We are relieved that the last of the blanks is completed.
The natural rubber torpedo tube gaskets installed on Pampanito are over 70 years old. We saw some leaking when we opened them during our last dry-docking, and the other museum boats have reported leaking on their boats. Unfortunately, there are no drawings of the correct gasket. So we were fortunate to have an experienced Lockheed engineer Paul Flowers volunteer to design a gasket, Master Chief (Ret) Charlie Butcher restore and operate the torpedo tube door hydraulics, Eutsler Technical Products created custom molded gaskets, Allied Fluid Products helped us modify the test gasket.
The Youtube video below shows USS Pampanito's #1 torpedo tube opening without the shutter door installed. We chalked the newly designed and installed rubber gasket, closed the door, and here you can see it opening. The lighting is not great in the video, but the chalk was transferred from the gasket in the door to the front of the tube. The chalk was confirmed by our Ships Manager Aaron Washington, the BS&Y Project Manager, and myself. https://www.youtube.com/watch?v=YaW_y1LY5QU
More steel was fitted and welded in place forward. Aft they continued creating templates and removing lacy metal.
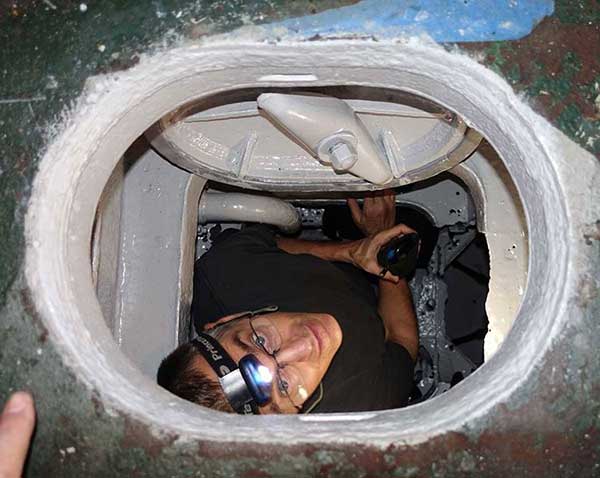
The iron man of panographic photography (see Pampanito tour), and Pampanito volunteer, Bruce Ecker came from San Pedro to document the sanitary tank, and main ballast tank 6A. These are extremely difficult places to photograph, confined spaces, hot, small, 12"x16" manhole, no lighting, etc. He spent over an hour in the freshly painted sanitary tank, and almost two hours in the ballast tank.
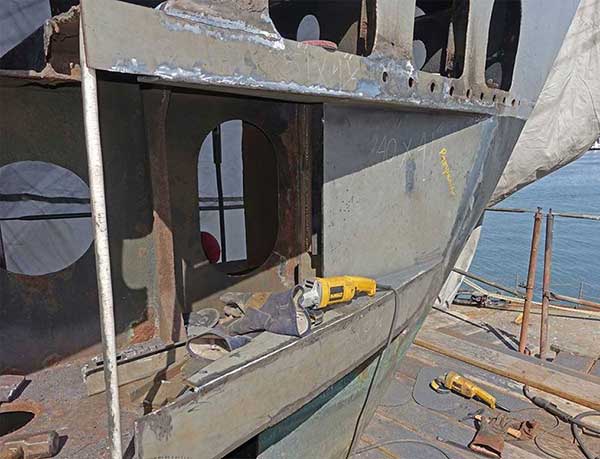
Most of the photos I have posted are from the forward end of the boat. The free flood spaces, and wind and water line aft is smaller than forward. It makes maintenance, repair, and good photography more difficult. The yard has finished the big removals of the shell plating and spent yesterday and today doing a lot of measuring up for the replacement frames, etc.
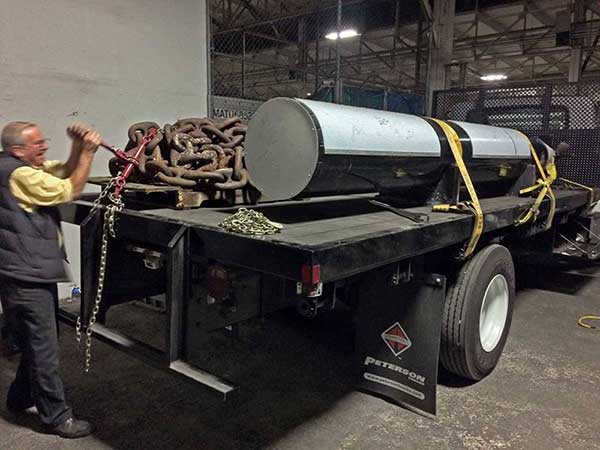
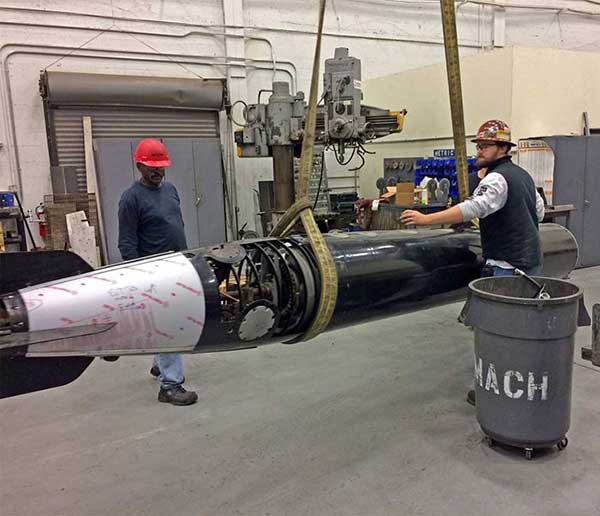
Our Mk 18 electric torpedo was loaded up at Pier 45 and delivered to the shipyard. Everything about this torpedo is more delicate than the Mk 14 steam torpedoes currently loaded on the boat. These were introduced about the same time Pampanito was launched. They were much simpler and cheaper to build than steam torpedoes and did not leave as big a wake trail of bubbles. They were also slower, shorter range, and less consistent in speed. About 30% of the US torpedoes fired during the war were Mk 18s.
This torpedo was cut away as a training aid. It still has over 1,000 lbs of batteries installed, but the large cutouts removed a lot of strength from its already thin case. Every move is treated with great care.
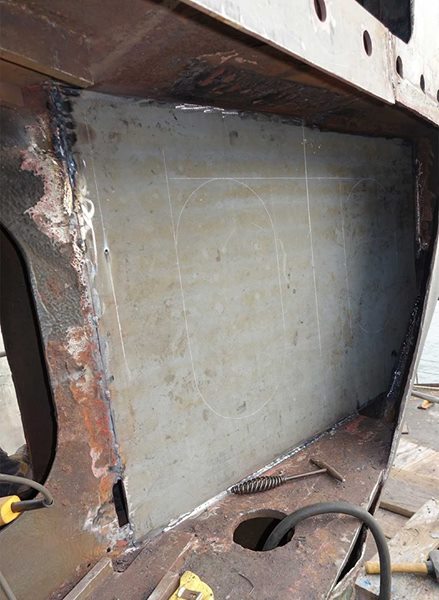
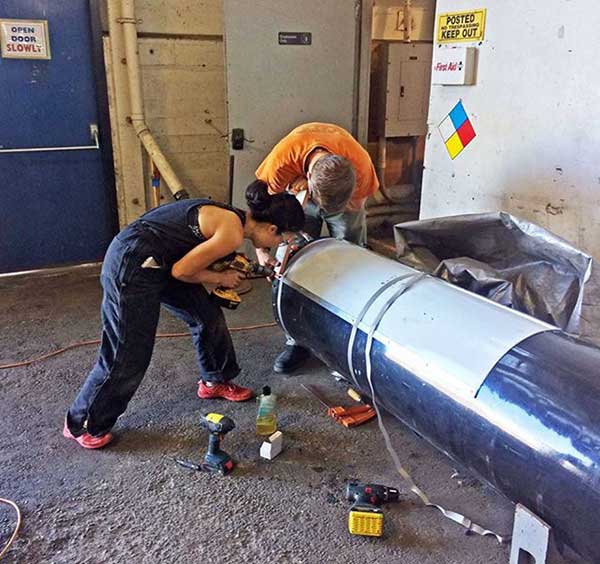
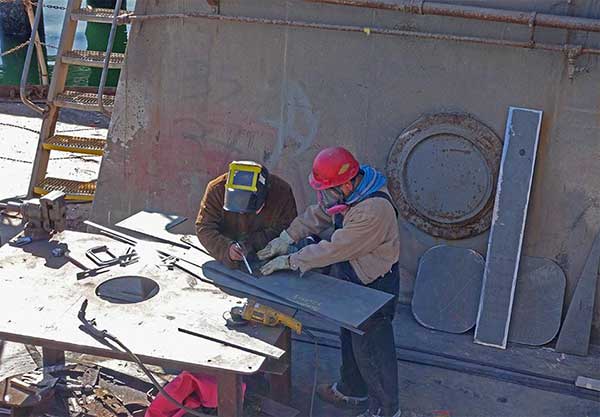
Real ship fitting is a 3 dimensional task. The previous post showing the blanks showed some of the layout. In these photos you see the template made of thin plywood (aka Luan or utility panel.) It just has to fit inside or outside the hole, then a compass traces the hole shape onto the board (spiling.) They rough cut the steel, bend if curved, test fit to within 1/16" or so, tack weld in place, full weld, and if not done before cut out the lightening or hand holds. Every step is a skilled task.
One of our goals for the dry-docking is to load a cut-away Mk 18 electric torpedo. Oliver Hickman and Lauren Usui have been working nights and weekends to complete the visitor proofing. More on the Mk 18 torpedo loading project.
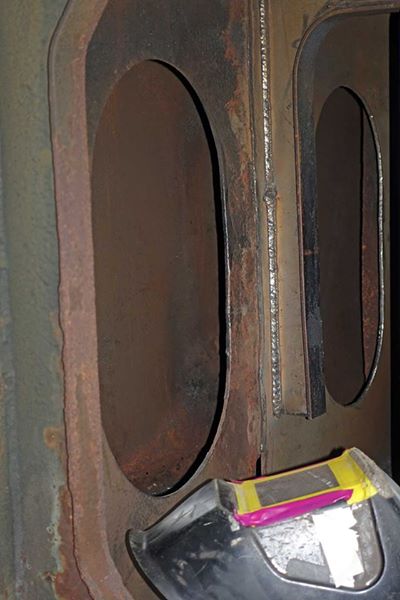
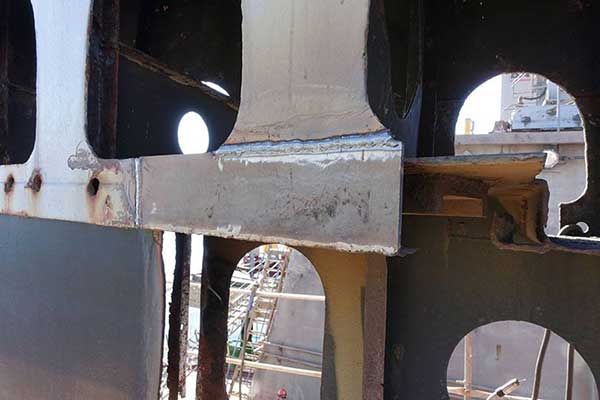
One of the newly repaired frames. Note that the lightening holes are replicated. We do this not just for historical accuracy, but because they are functional and necessary.
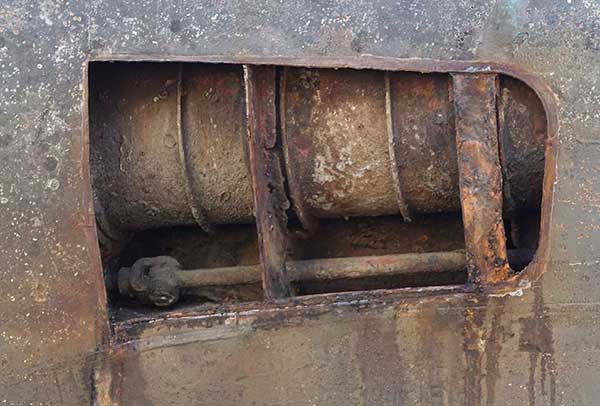
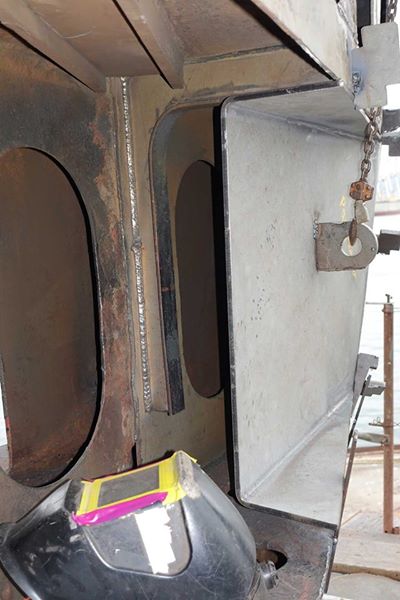
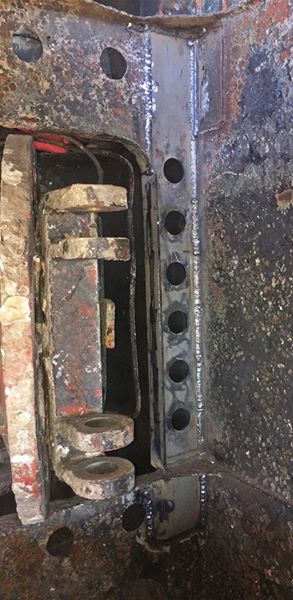
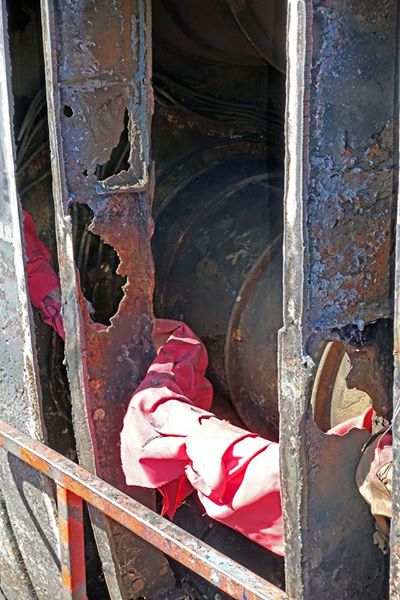
The torpedo shutter door control rods in the free flood space forward are normally only accessible from inside the chain locker and the void across from it. Note in the second photo the original tap riveted covers are in place. We did not know these were there until the outer hull was cut out to repair the frames.
See: https://maritime.org/tech/drawings/framing-bow-elevation-flats_basic387258_5400-03-0208.jpg
These frames have no strength left and must be repaired.
Replacement steel is staring to be fitted in place. Sometimes the old piece can be used as a template, sometimes they create a wooden template. In this photo the piece is test fit, it will come out and adjusted for a tight fit before welding.
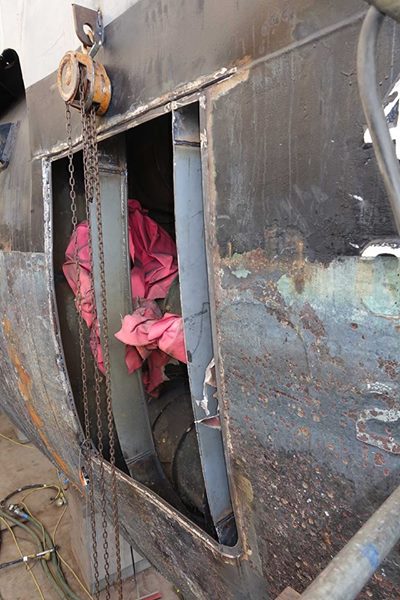
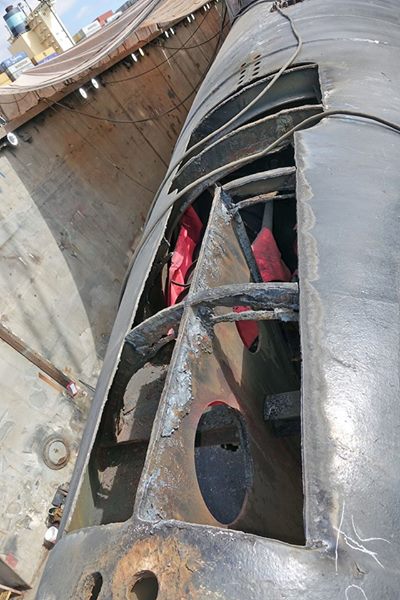
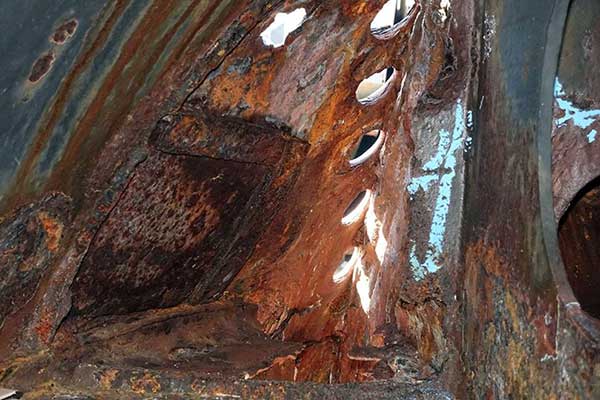
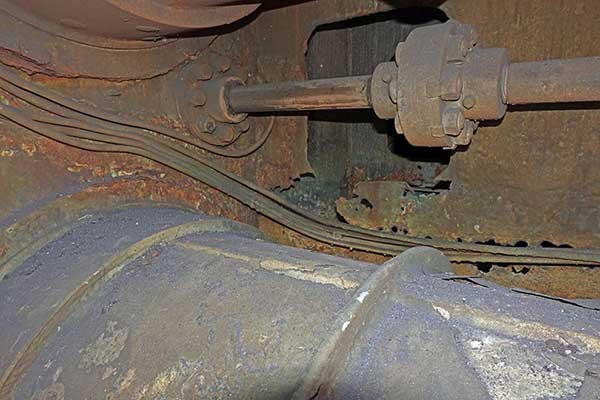
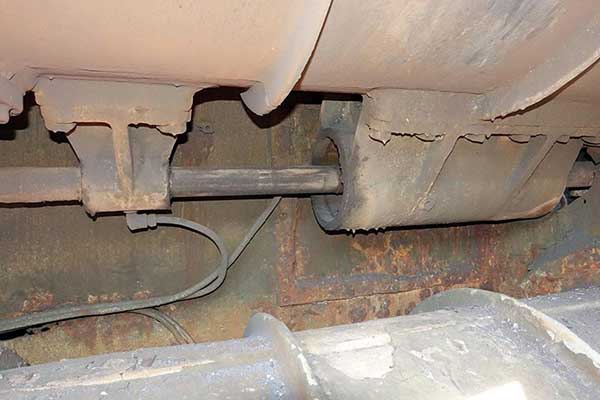
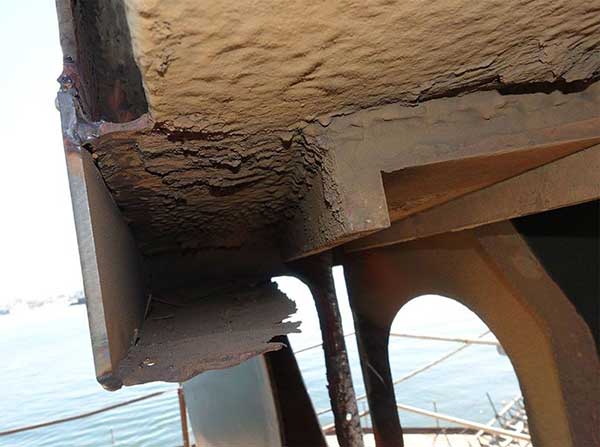
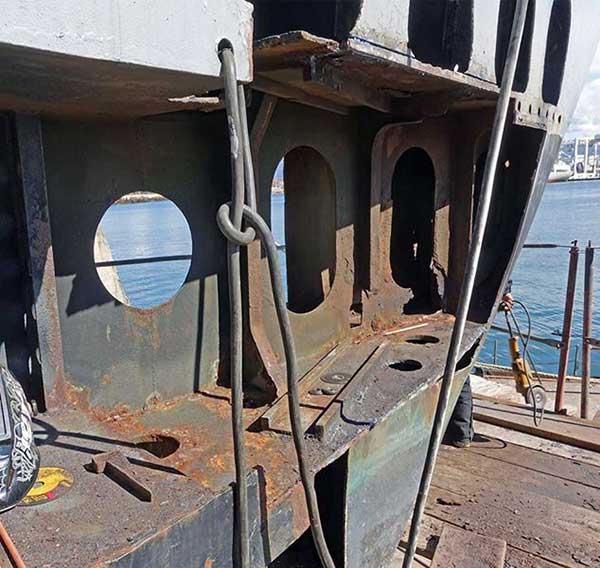
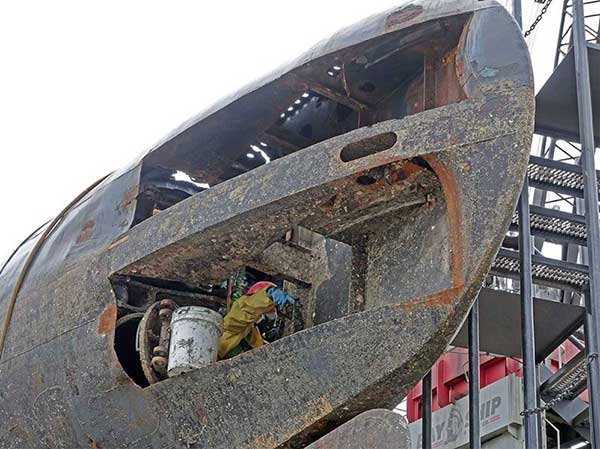
We had to make some big cut outs to replace the thin hull section that had holes breaking through and to get access to the frames. You can see the bronze torpedo tube, and the hydraulic torpedo shutter door rod below it. The entire area behind here is a free flood zone. Parts of it where filled with bitumen.
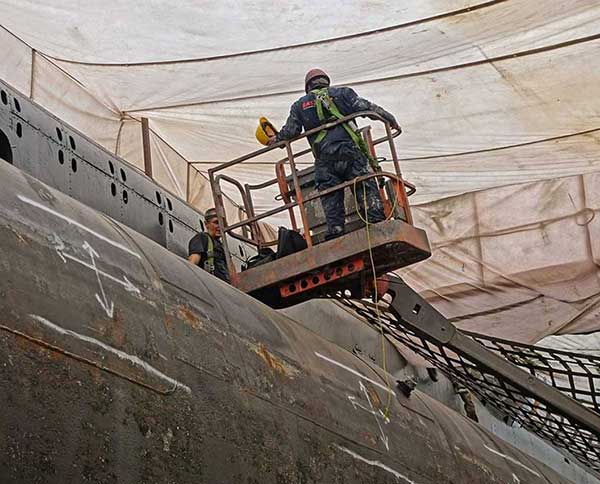
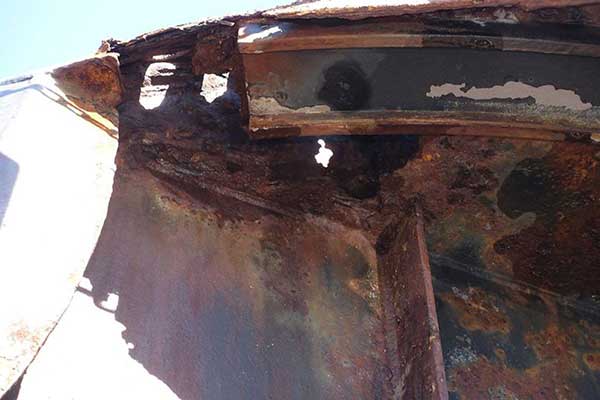
With the torpedo shutter doors in place it is hard to get good working access to the stern of the boat. At the pier it is really hard even above the waterline. You can see in these photos that starting at the wind and water line and going up everything is free rusting. With the torpedo shutter doors off we have the first really good access to this area since 1987. We are going to do some serious steel repair in this area. However, as it stands right now we do not have enough money to blast to bare metal all the places that have rust showing. This is going to leave a liability for the next drydock.
There are roughly three ways that we prepare for coating. (Among professionals, coatings are for protection, paints for cosmetics). As a museum with a goal of long term preservation of the historic fabric we try to minimize the amount of blasting to bare metal. However, this is really driven by the need to have well adhered coating to protect the steel. On the wind and water line, the best quality coatings that are applied to a properly prepared surface last about 5 years in our environment. Because the torpedo tube shutter doors are out we have the best access to blast and coat since 1987. However, we would need at least $50K more than we have to blast to bare metal all the areas in the free flood spaces forward and aft. Large areas of the hull have spotted failed coatings that were not present when we came out of the water during the last two drydockings at roughly 7 years. We do not have the money to blast all of this to bare metal, so we will be be doing less that we know we should for maximum preservation of steel, coatings, and long term cost. We are going to have to raise quite a bit more money for the next dry-docking and be prepared to blast most of the hull, and we will have to get to drydock much sooner.
Ship fitters on new build ships form the steel from patterns, molds or drawings. The kind of repairs we are doing require the highest level of skill because they need to match the eccentricities of the other steel around the insert. Many pieces are bent in three dimensions. There will be dozens of pieces created during this dry-docking.
There are also dozens of decisions of which damage to replace and which to leave for next time. This can become a complex, multi-factorial problem. For example, safety, preservation of historic fabric, cost in short term, cost in long term, memorial integrity, visitor appeal, preservation of functionality all come into play. We have not estimated all the needed steel repairs we are leaving behind below the waterline, but my WAG (wild ass guess) is over $100,000. By the time we get done during this dry-docking, there will probably be more damaged steel that needs repair above the waterline than below. Some of this we can do at the pier, but some requires skills, infrastructure, and no visitors aboard to be done safely and will have to wait for a future dry-docking.
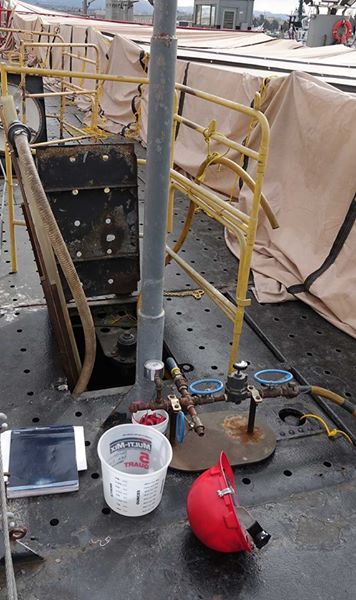
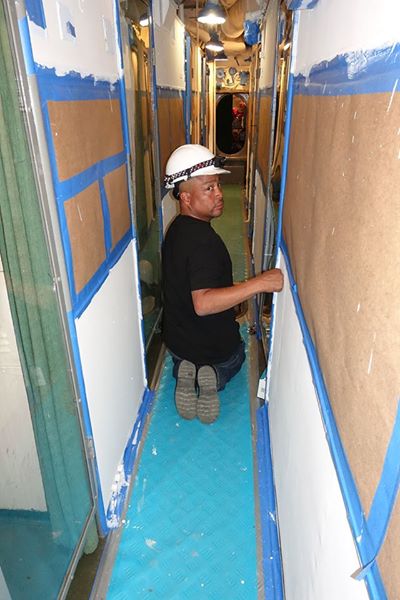
Painting in the visitor path on Pampanito is always a challenge at the pier. We are open every day of the year and most paints will not really dry overnight. So while there are no visitors aboard Gary Fong in the photo below, and other deck hands are prepping and painting as much as they can.
Here the crew is repairing the fiberglass boot over one of the propellor shafts. These are fiberglassed to isolate the bronze propellor shafts from the hull, and to protect the wooden bearings inside (lignum vitae strips). On the boat end, they also add a layer of protection to the tail shaft packing where it enters the hull.
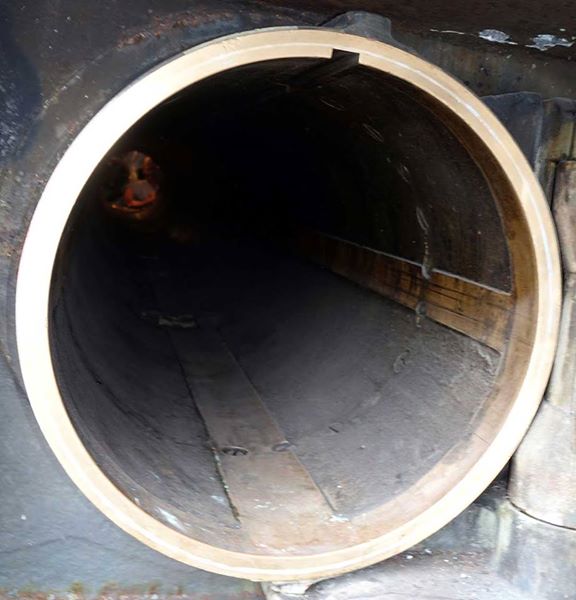
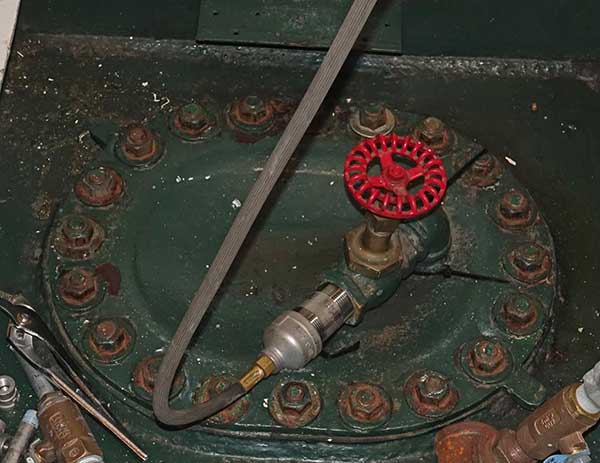
Yet another way that has been used during this dry-docking to avoid explosions in tanks behind the steel being welded is to fill it with an inert gas, in this case CO2 in the tank to displace any explosive vapors. This is the manhole leading into one of the lube oil tanks that is near some welding. This tank still has a film of lube oil that was aboard when the Navy donated the boat. We would like to clean the tank, but resources...
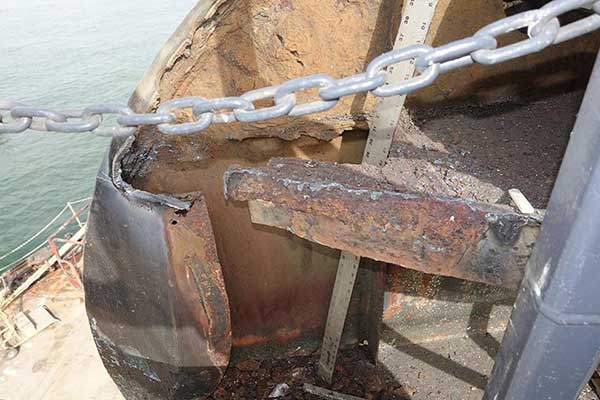
The torpedo shutter doors near and above the wind and water are rough. Lots of wasted away metal to be repaired.
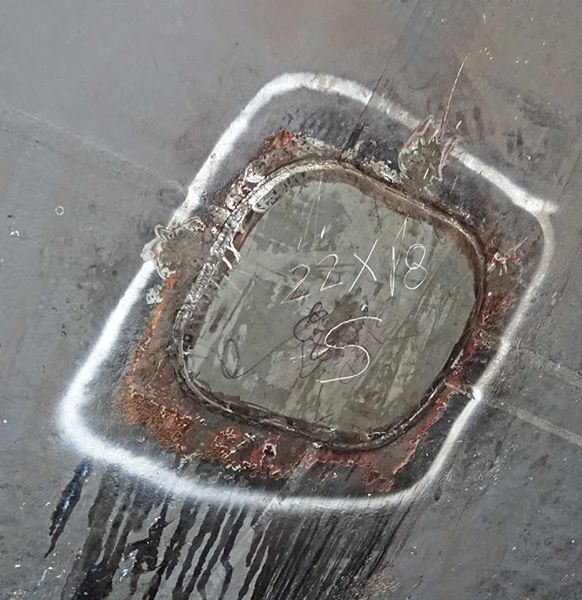
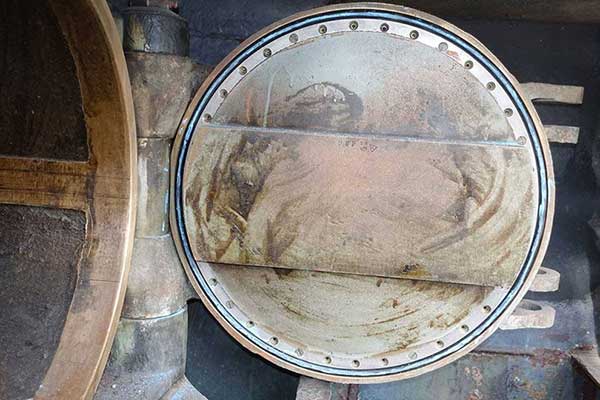
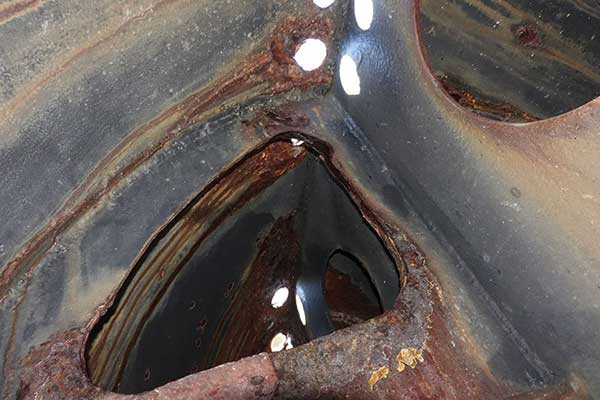
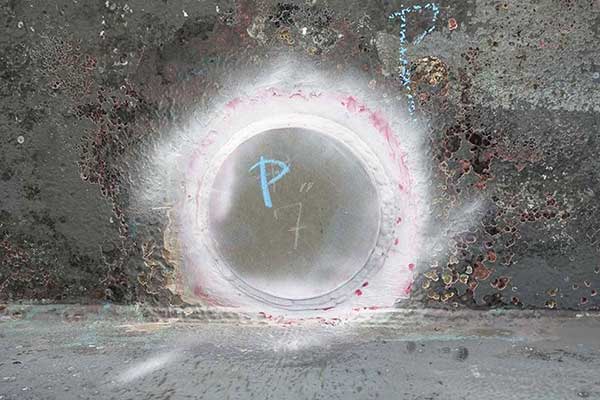
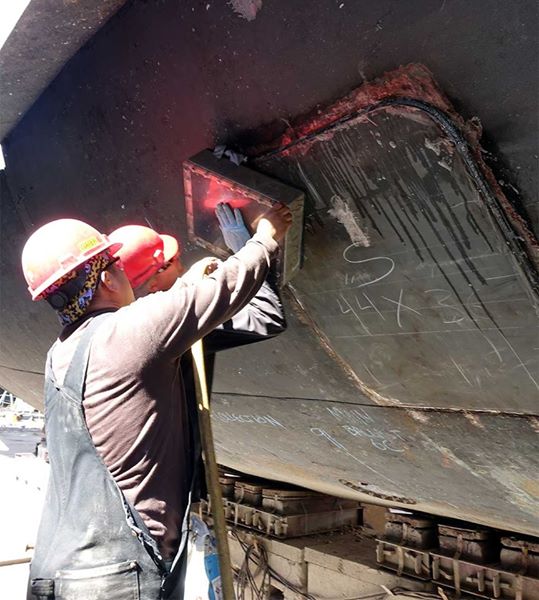
The photos below show another way to check the seal on the blanks we have welded over the hull openings. In this case they are using a liquid dye penetration test because there was not room to use the vacuum box in the earlier post. In particular it is Magnaflux Spotcheck, but there are other similar products.
The surface to be tested is first cleaned, then the penetrant is applied and given time to penetrate. The excess penetrant is wiped off the surface, then a developer applied. In the photos the penetrant is red, and the developer is white. Defects are marked by a deep red indication. A line or dotted line marks a crack or lack of bond. Porosity and shrinkage will appear as dots. In the photos the one marked P (port) is probably OK. The one marked S (starboard) did not pass. 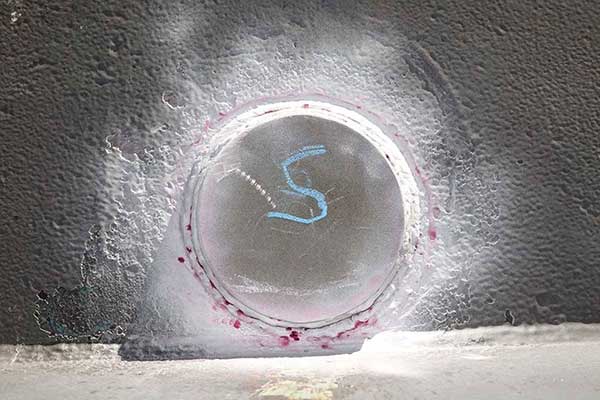 Wednesday, October 5, 2016
We have been preparing a very rare Mk 18 torpedo for loading into the boat. This torpedo was cut away as a training aid by the Navy. The cut outs have reduced the strength of its case. When loading at pier 45 the crane lifting the torpedo is fixed to earth while the submarine is moving. The wind and waves determine when and how hard the torpedo lands on the boat. In the drydock the crane and submarine are moving together so it is much gentler at the point of contact.
There are two routes into the torpedo room. All the torpedoes we have loaded as a museum have been loaded through the non-historic visitor access (dog house and cut away torpedo loading hatch). Because we are in drydock, we have the option of loading the torpedo through the second route which is an open torpedo tube. We have not decided which direction to enter yet. The torpedo is a very tight fit in the tube. To enable to the possible entry through the tube we needed to clean the inside of the tube so the torpedo would not get stuck. Dylan from the Association's education crew is showing a big smile in a tight space.
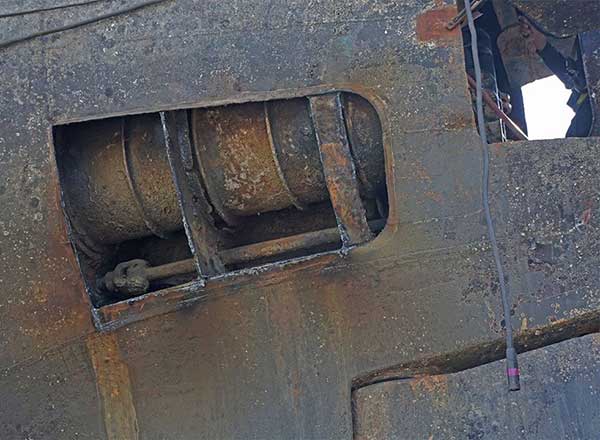
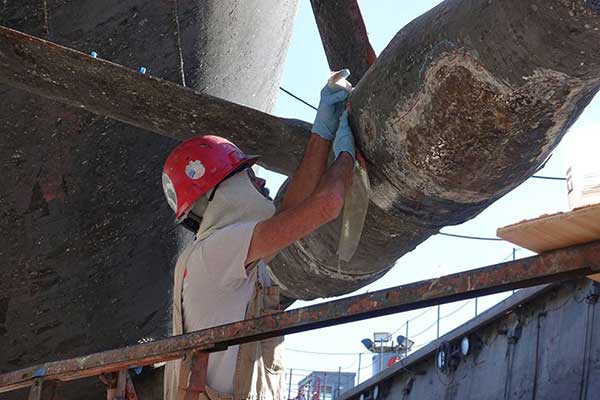
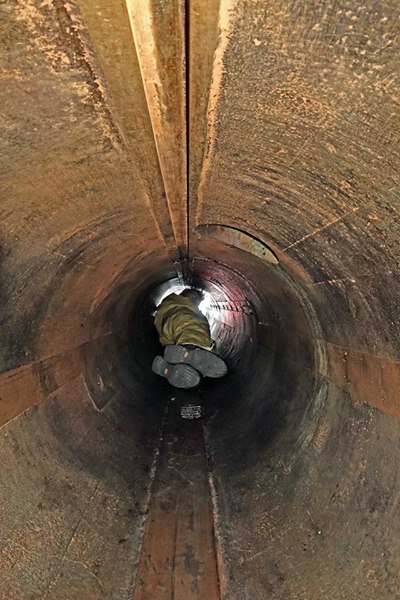
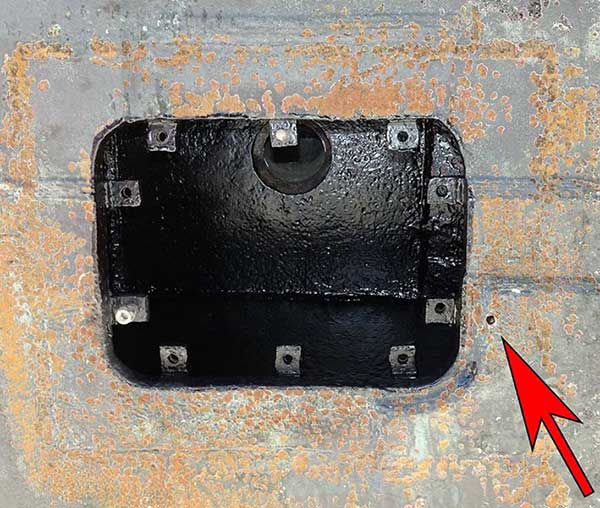
Because the metal on both sides of the steel are heated, the shipyard crew and marine chemist are always thinking about where that heat will go. This sea chest has doublers (sheets of steel welded over the hull) on the right. Because it might be possible that there is some oil between the layers of steel, the crew drilled a hole this morning (see the red arrow) for access between the layers to verify that there is dangerous in there. The tank behind this is Normal Fuel Tank #7. It contains fresh water treated with sodium silicate that we use as ballast. The tank was close to full, but not completely, they added fresh water to assure there is no space for explosive fumes.
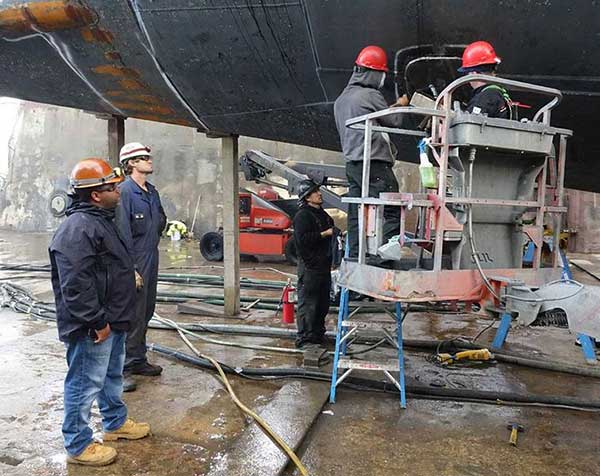
After welding a blank over the aft engine room sea chest the seams were multi-pass welded. The welders in this photo have sprayed soapy water over the seam, they are holding the vacuum box over the seam and looking for bubbles indicating holes.
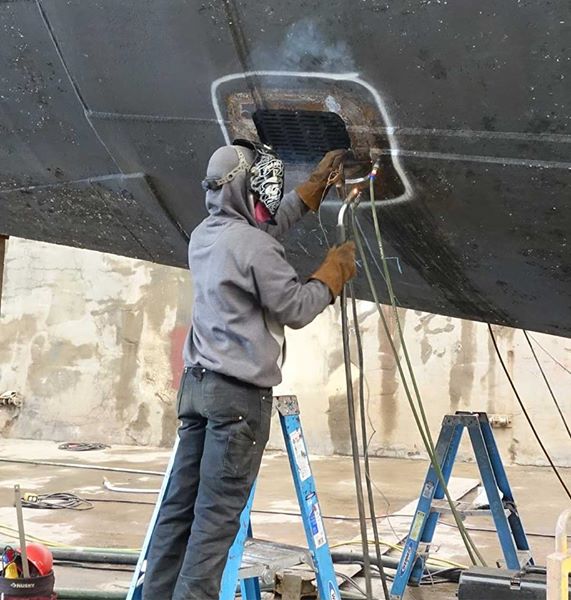
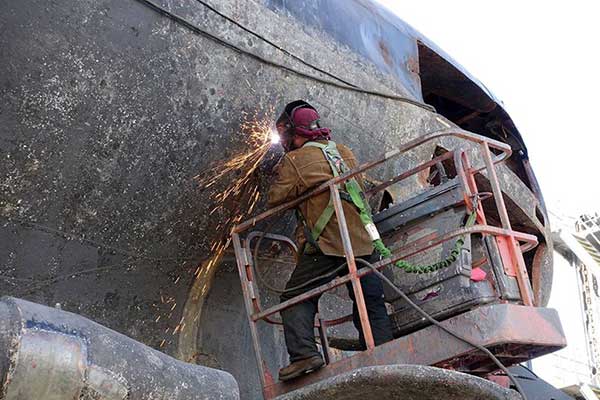
The welders started the repairs forward cropping out (cutting out) the areas that will be replaced. We could not have done these repairs with the shutter doors in place.
The shipyard crew got the last of the torpedo shutter doors off today. This is an import milestone because tomorrow they will water blast and expose the damaged areas around the tubes aft. Shortly after the ship's manager will finish identifying which areas we will be repairing and what will be left for the next dry-docking. There will be very few work order changes after this.
We are a bit behind our expected schedule.
Index:
|


 />
/>


 />
/>